We sincerely appreciate you for choosing our theme. We are delighted to welcome you as a valued customer🙌. Your decision not only supports our business but also reinforces our commitment to providing high-quality products and support. We understand that you have many options in the marketplace, and we are grateful that you selected Optimal theme for its quality and features.
Please do not hesitate to reach out to our dedicated support team.We look forward to serving you 😊
Installation is easy and quick. We recommended you to read Shopify Manual to have clear idea about all the aspects of theme customization.
INFO! If you don't want to spend your time installing the theme and store set up, Feel free to contact for our paid store setup serivce. You can send an email direct on info@adornthemes.com.
We will reach out to you very soon.
Don't have store yet? You can send an email on info@adornthemes.com. We will create Development store for you with unlimited trial time. You can Transfer ownership when store is ready to launch.
Extract/Unzip all files from downloaded package. Find "Optimal-install-me.zip" file. This is Home 1 Default Demo zip file. Install this zip file on your shopify store.
You will also find Demo Preset folder which contains preset/data files for other home skins/demos, User guide file and read me text file.
Store Admin -> Online Store -> Themes Click "Add theme" -> Upload zip file. Click here

By Default your uploaded theme is unpublished. You can publish new theme when you are done with theme configuration and setup.
To publish new theme click on Publish button
To install other premade home skins, Follow below steps
This include from Demo 2 to rest all other demos

All you need to do is copy all data from index.json and settings_data.json file from any preset folder file and paste it on same theme file on your store. Explain in below steps..
In Preset folder, You will see folders for all available skins. Please open any skin folder which you would like to install.
Click here to see all available home skins/demos
You will see 2 files index.json and settings_data.json. You need to copy these file data one by one

Now Go to Optimal theme which you just uploaded. Click three dot icon –> Edit Code

Find Templates folder and open index.json file.
Select and Remove all data from this file. Now paste preset data. ( index.json file data you copied in Step 3) And Click Save.

Find Config folder and open settings_data.json file.
Select and Remove all data from this file. Now paste preset data. ( settings_data.json file data you copied in Step 3) And Click Save.

Customize your store search, filtering, and product recommendations, so you can enhance your products’ relevance and sell more.
Craft stunning web pages without code. More advanced customization to convert your visitors. PageFly caters to everyone, from first-time store owners to fast-growing merchants and expert agencies.
Create effortless shopping experiences that boost conversion & maximizes AOV with Boost AI Search and Discovery. A powerful search app that uses AI to deliver lightning-fast & most relevant search results. Help shoppers find their next favorite product with AI recommendations
Complete, easy referral & affiliate program app, trusted by top brands & experts for a revenue boost. Discover UpPromote's powerful influencer marketing & referral program, winning the hearts & brands' trust through real testimonials
Please do follow below required settings on your store.
Go to Store Admin -> Settings -> Customer accounts
Click on Edit Link and Do as below and click Save

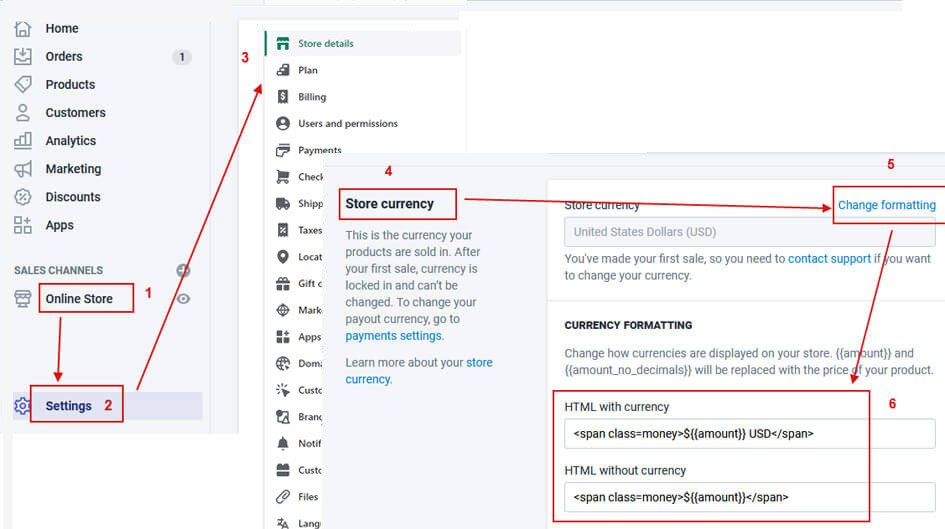
Go to Store Admin –> Settings –> Store details
Scroll down to Store currency block and click on Change formatting link
Update these fields
HTML With currency to
HTML without currency to
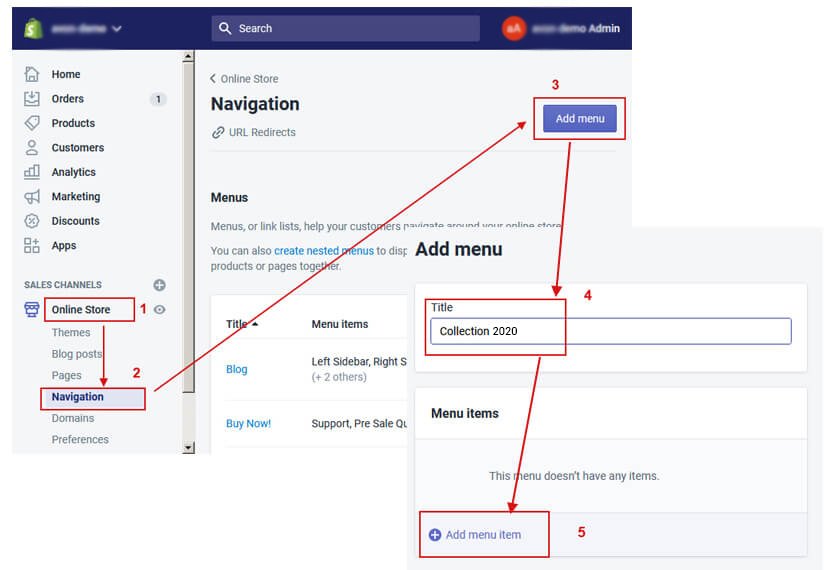
Go to: Online Store -> Navigation -> Select Add Menu button
Preview of Single link menu

Online Store –> Customize –> Click Main Navigation –> Add block –> Add Single Links This is very easy. Set Link Name and Select Menu Link. Repeat this steps for all menu items you want to display.

Preview of dropdown menu


Online Store –> Customize –> Click Main Navigation –> Add block –> Add Dropdown Menu 
Preview of Megamenu Simple
Online Store -> Navigation -> Add Menu with Sub Menu Items As display below ( below screenshot is only for reference )
Online Store –> Customize –> Click Main Navigation –> Add block –> Add MM Simple 
Preview of Megamenu top image banners
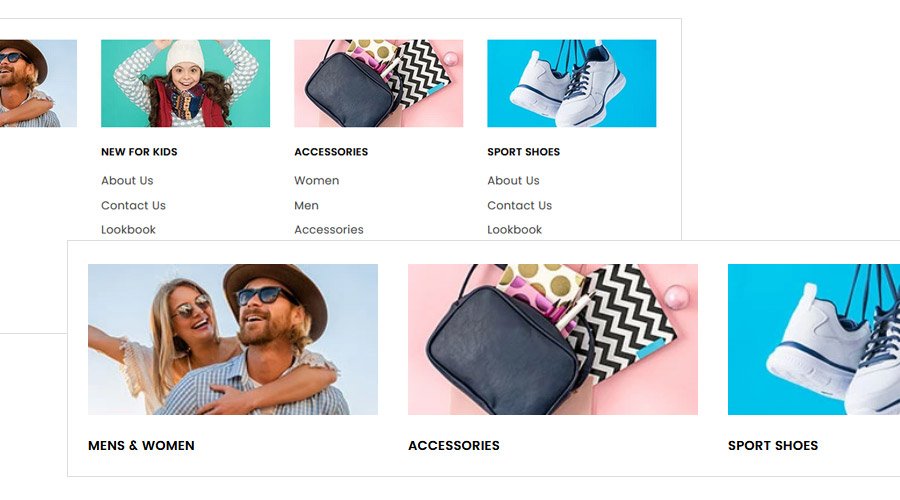
Online Store -> Navigation -> Add Menu with Sub Menu Items
Go to Online Store –> Customize –> Sections –> Main Navigation –> Add block –> Add MM Top Image Columns
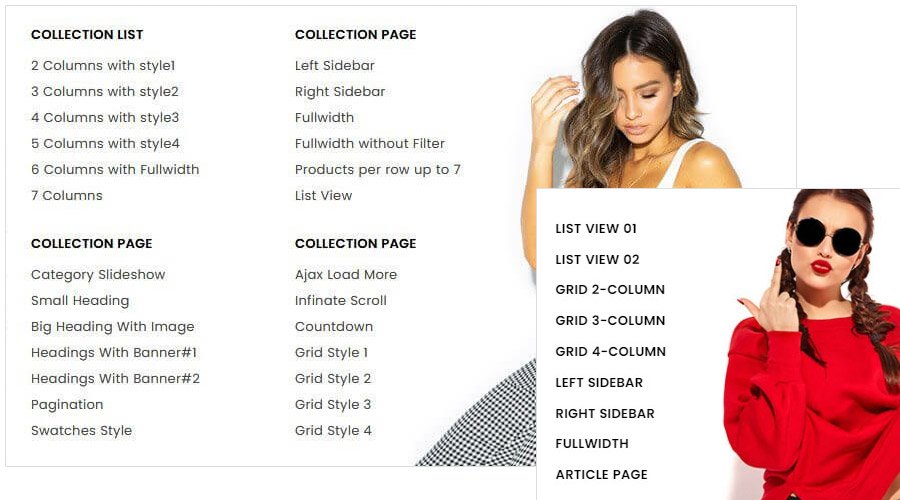
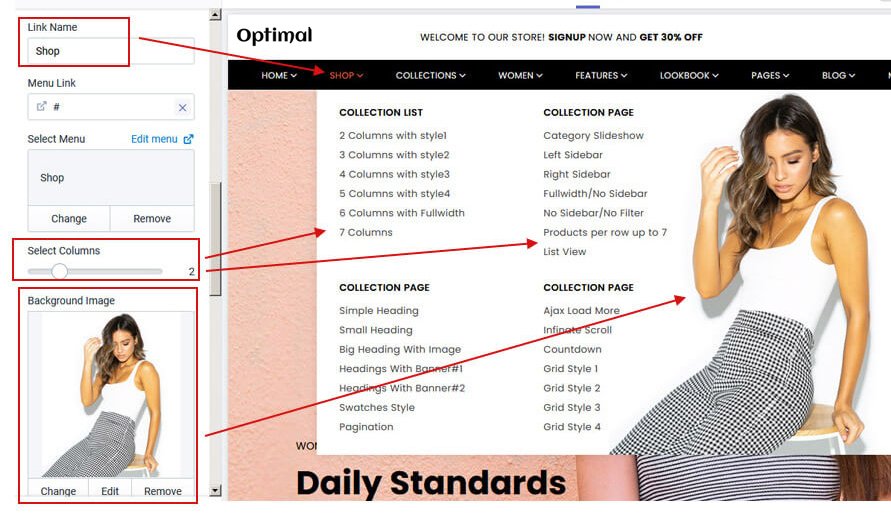
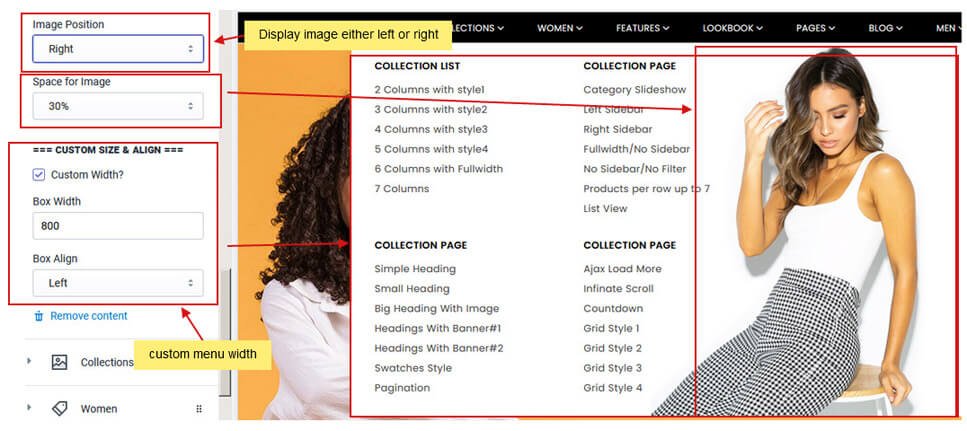
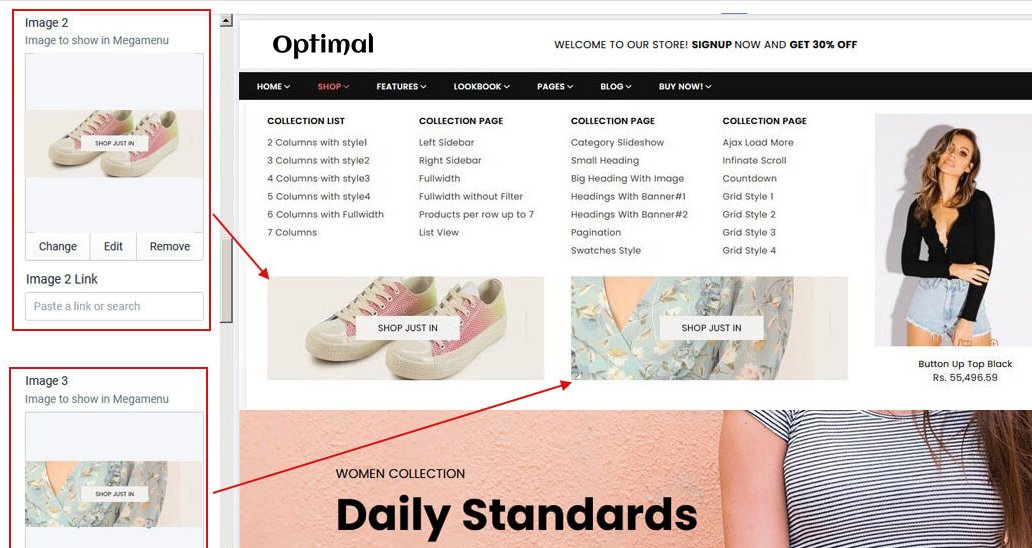
Preview of Megamenu Links with Image

Online Store -> Navigation -> Add Menu with Menu Items (Without Sub menu item)To use this megamenu, you need to create simple Menu with menu items. as shown in below screenshot

Go to Online Store –> Customize –> Click Main Navigation –> Add block –> MM Links with Image
Set Link Name, Menu Link, Select Menu and Select Columns

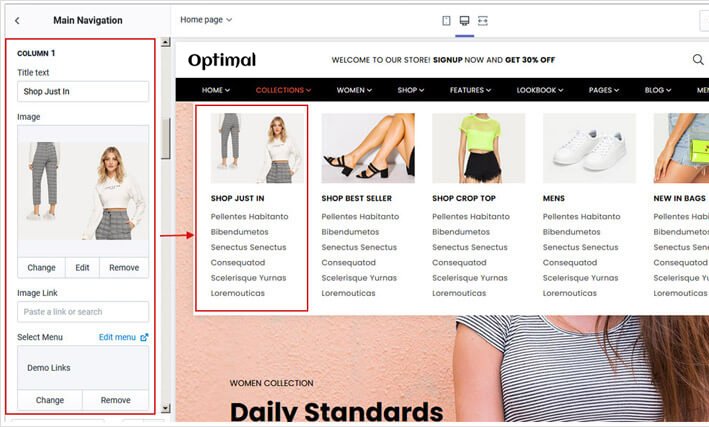
Preview of Megamenu Products
Online Store –> Customize –> Click Main Navigation –> Add block –> Add MM Products 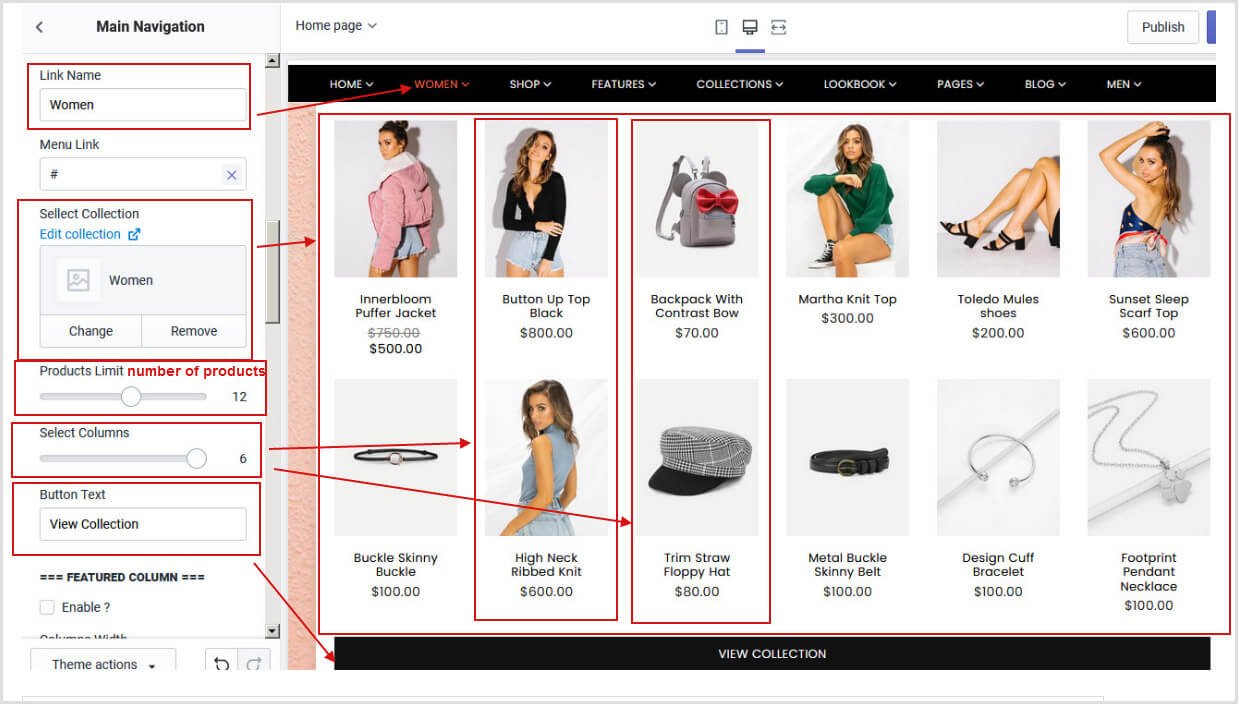

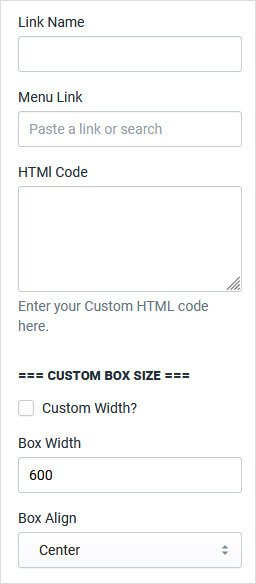
Display Custom HTML - You can put html code here
Go to Online Store –> Customize –> Click Main Navigation –> Add block –> MM Custom HTML
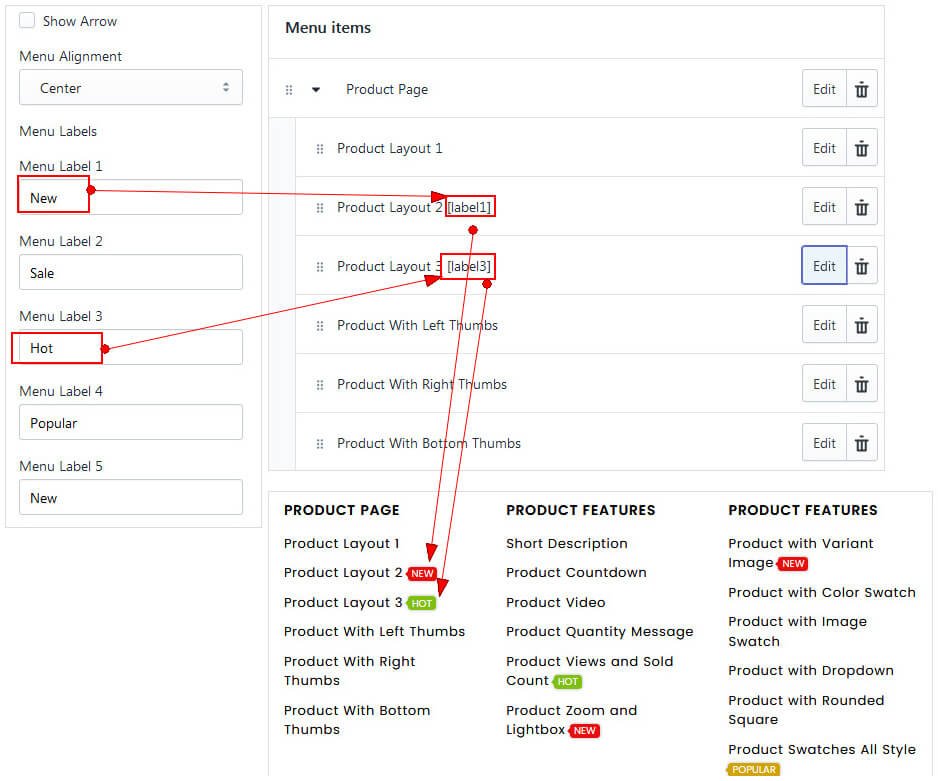
Go to Online Store –> Customize –> Click Main Navigation
Set Menu Label 1 to Menu Label 5 as required

Set menu labels with main menu items

Set menu labels with sub menu items
Online Store -> Navigation -> Select Menu --> Click on Menu items

You can create as many pages as you want. Here is shopify official link to learn - How to create a pages?
Click here to learn how to create custom page and add sections.
Templates for different pages are as below
Theme must be published to select page template!
We have added 3 in-built template for about us.
These templates are about, about2, about3. You can use these template for 3 different pages.
Now with shopify 2.0, It's easier for you to create more page template by yourself without coding knowledge.
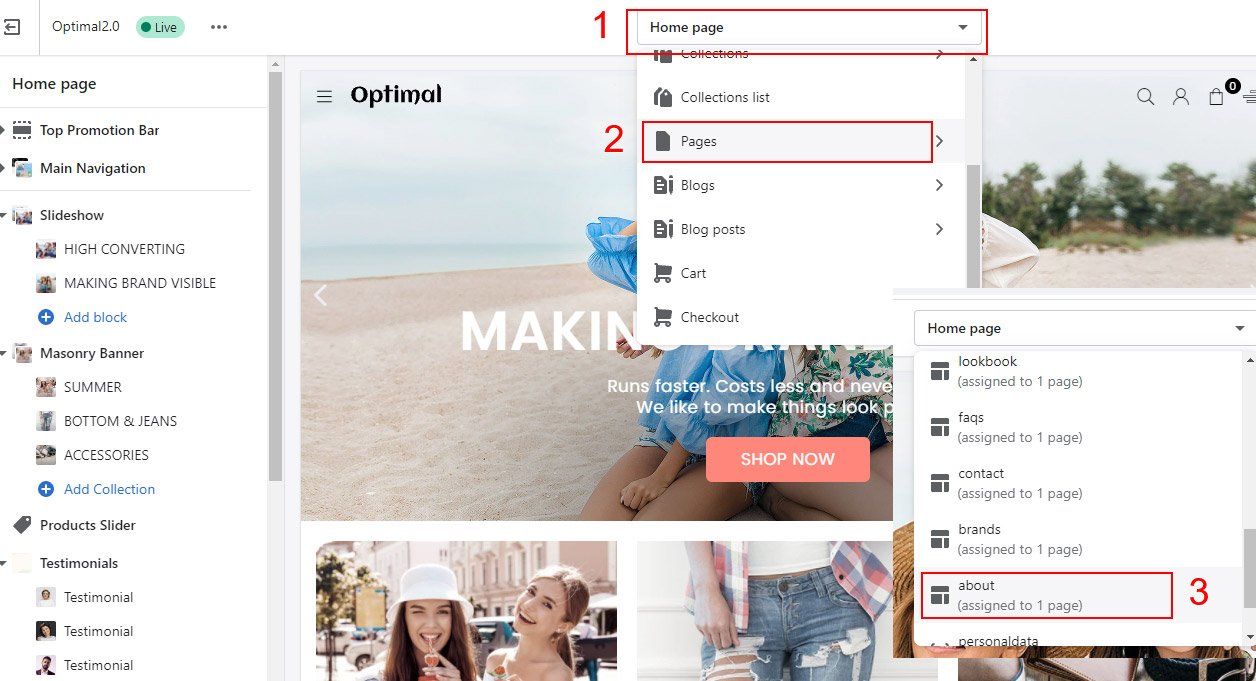
Online Store –> Pages –> Click Add page: Set page Title, choose Template about and click save button
 />
/>
Add page details from :
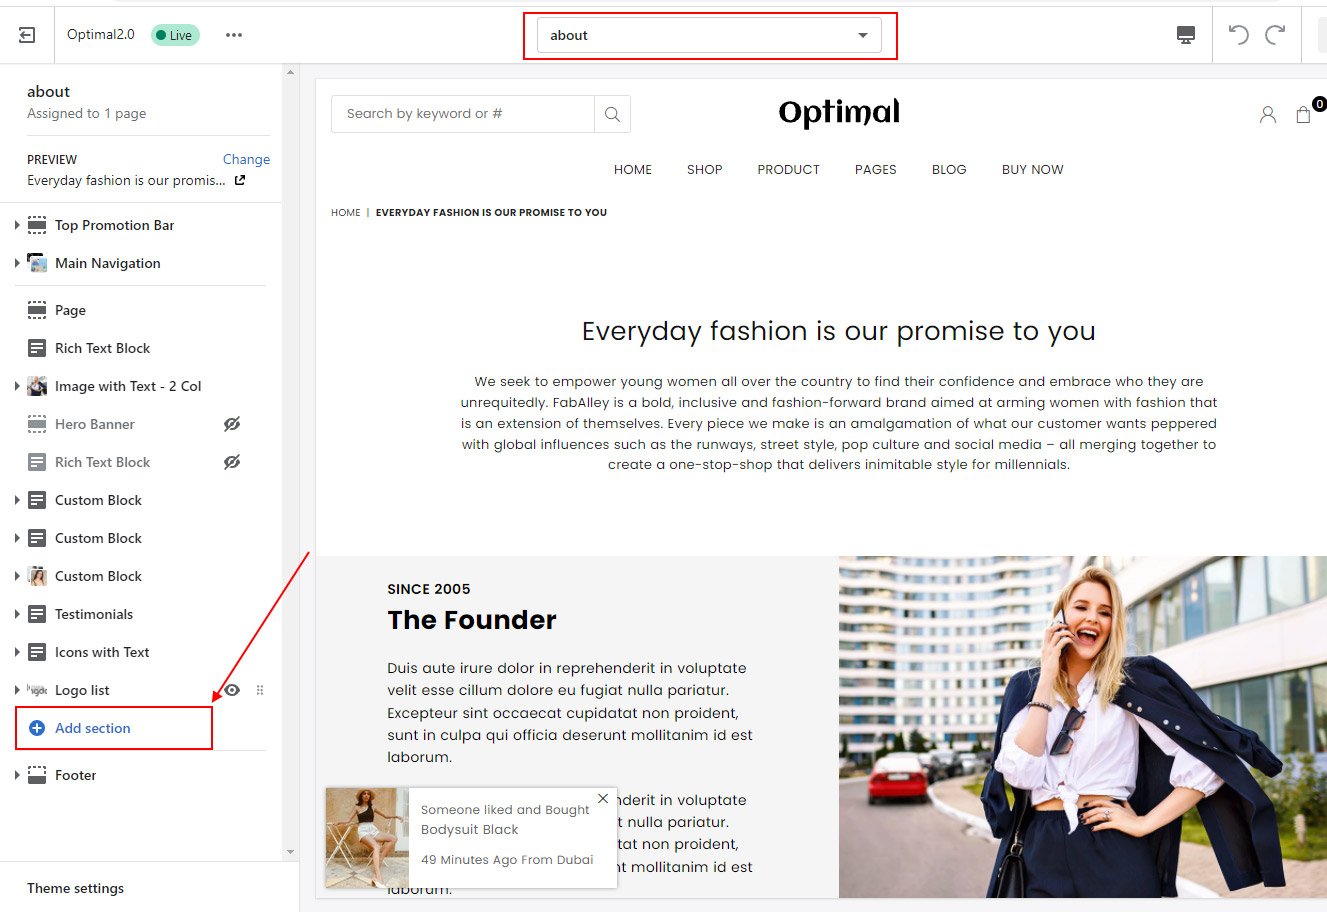
Online Store –> Click Customize –> Open the drop-down menu at the top of the page –> Pages –> about
You can add/edit page details here. Click on "Add section" link to add more section on this page.
Theme must be published to select page template!
We have added 2 in-built template for contact us.
These templates are contact, contact-2,
You can use these template for 2 different pages.
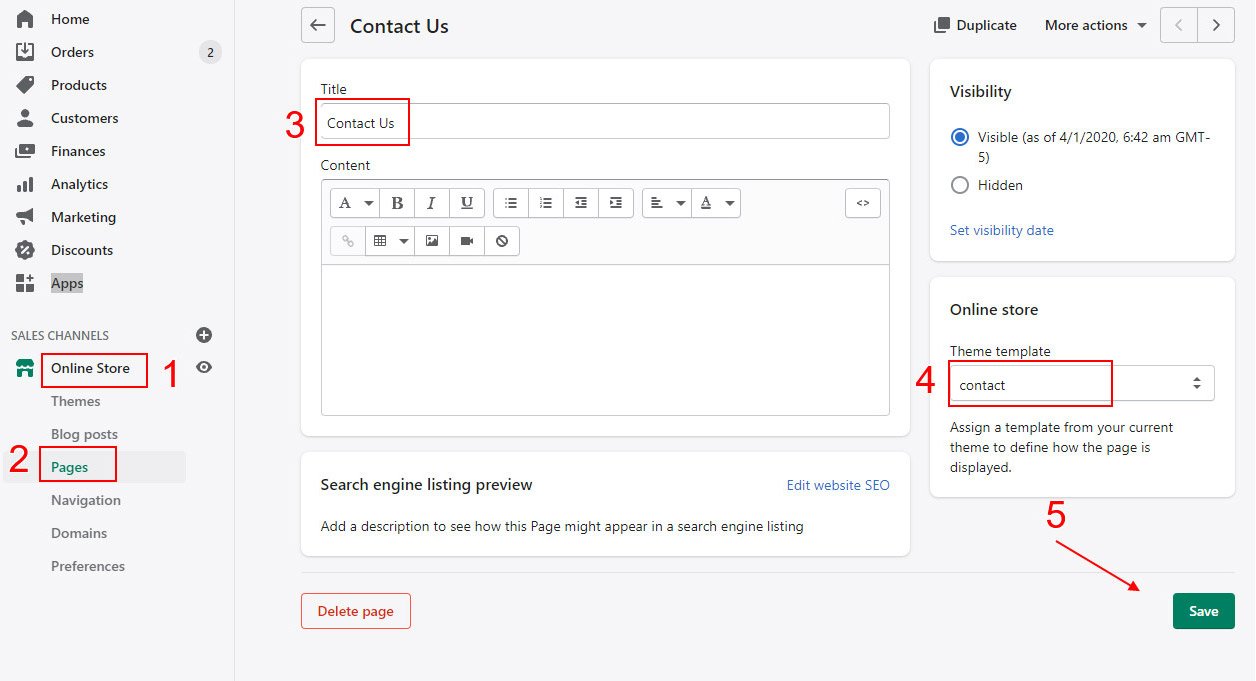
Online Store –> Pages –> Click Add page: Set page title, choose template contact or contact-2 and click save button
Add page details from :
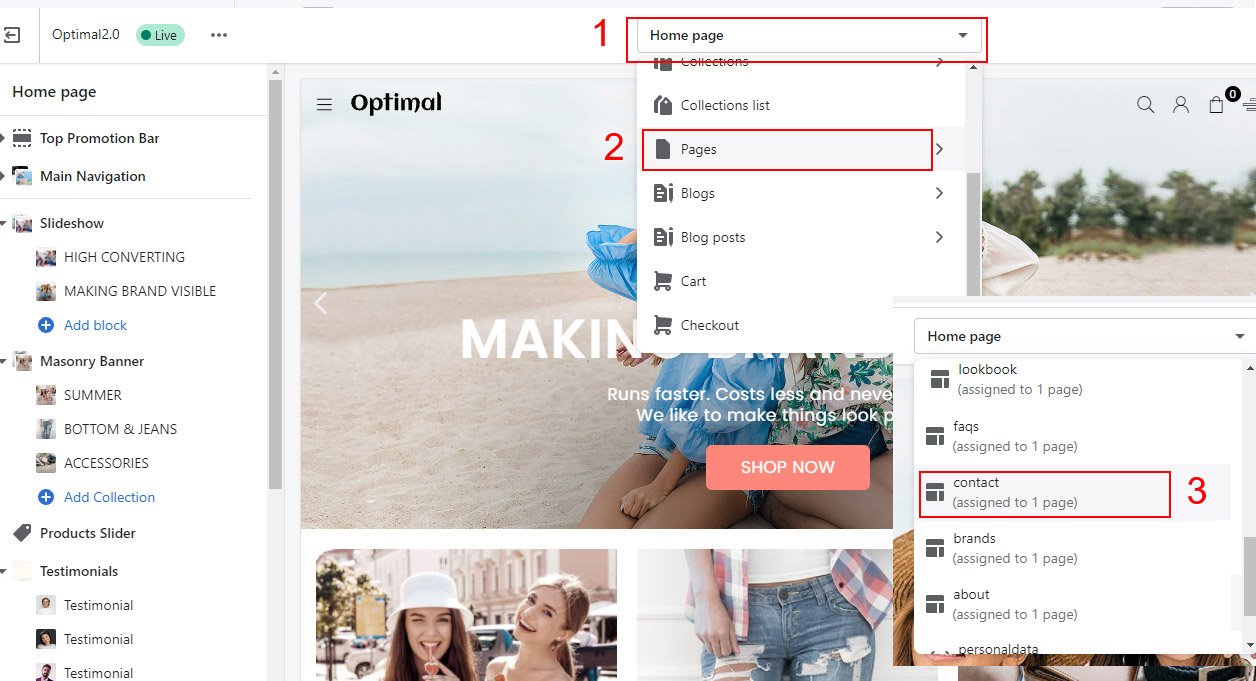
Online Store –> Click Customize –> Open the drop-down menu at the top of the page –> Pages –> contact
You can add/edit page details here. Click on "Add section" link to add more section on this page.
To add/edit contact field, please follow below guide:
Theme must be published to select page template!
We have added 1 in-built template faqs for FAQs page.
Online Store –> Pages –> Click Add page: Set page title, choose template faqs and click save button
Add page details from :
Online Store –> Click Customize –> Open the drop-down menu at the top of the page –> Pages –> faqs

You can add/edit page details here. Click on "Add section" link to add more section on this page.
Online Store –> Pages –> Click Add page: Set page title, choose template wishlist and click save button
Now go to : Online Store –> Click Customize –> Theme Settings -> General Settings -> Wishlist =====
Enable wishlist option and select wishlist page which you just created from admin
Theme must be published to select page template!
We have added 1 in-built template lookbok for lookbook page.
Online Store –> Pages –> Click Add page: Set page title, choose template lookbook and click save button
Add images and text from :
Online Store –> Click Customize –> Open the drop-down menu at the top of the page –> Pages –> lookbook
Click on "Add section" link to add more section on this page.
Click here to preview Collection List page
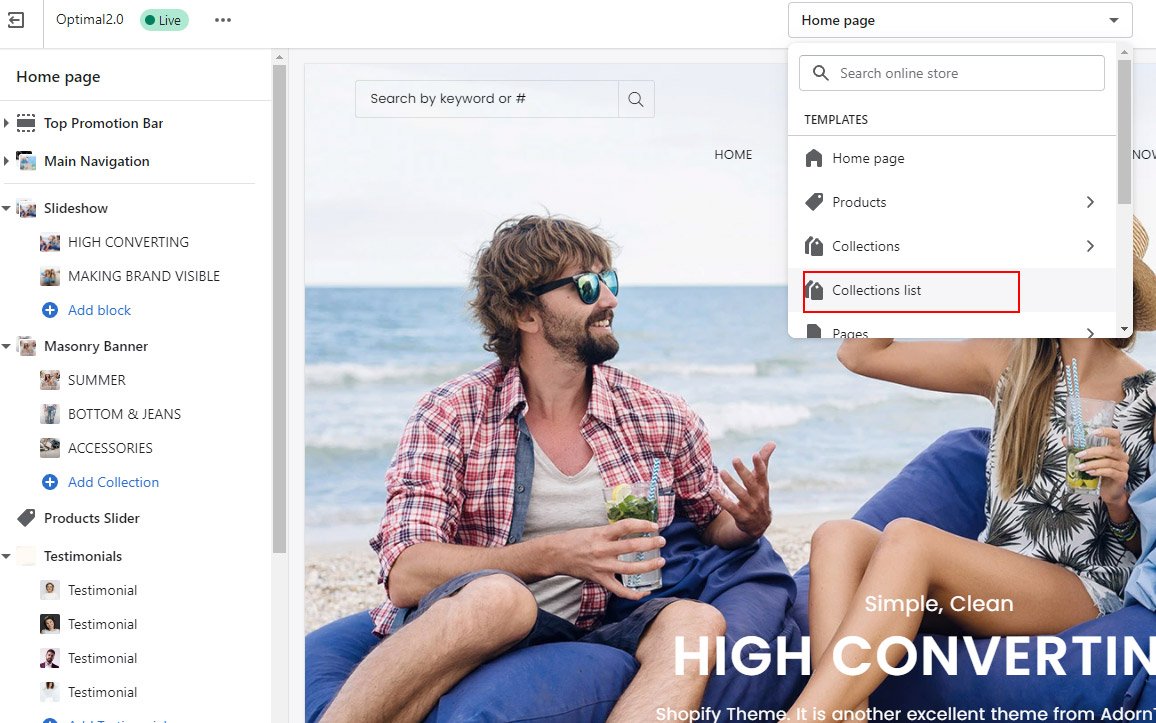
To create Collection List page, Go to : Online Store –> Click Customize –> Open the drop-down menu at the top of the page –> Collections list
Click on Collection List Page from left sidebar
Select collection block Or Click on Add Collection link
Select collection, upload image and add title.
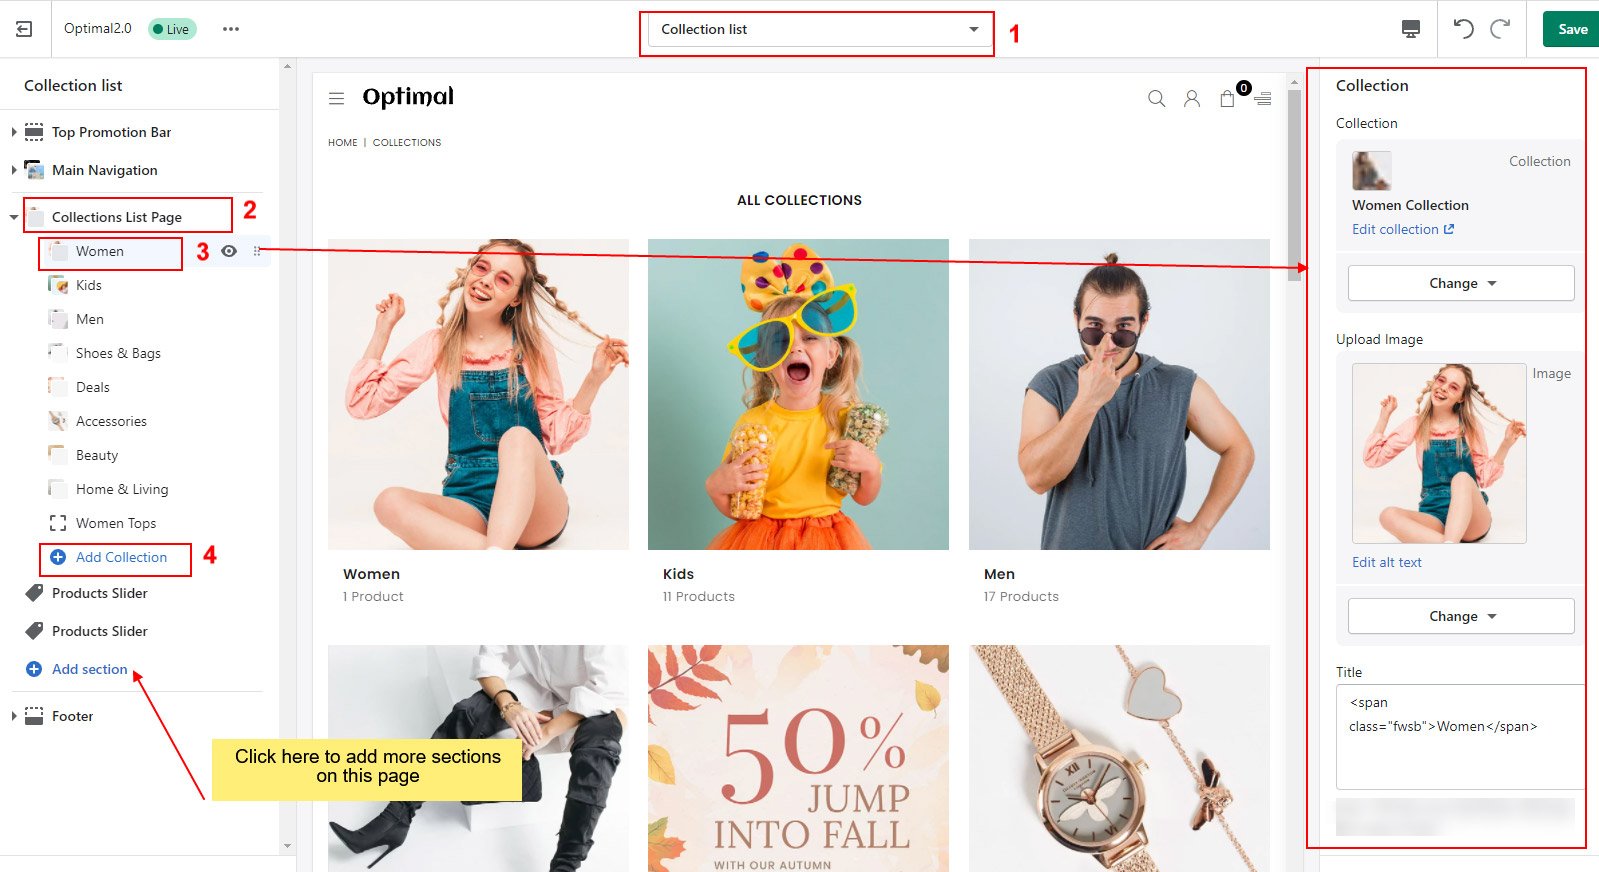
Click on "Add section" link to add more section on this page.
Click here to preview Sub Collection List page
To create Sub Collection List page,
Go to :Online Store –> Click Customize –> Open the drop-down menu at the top of the page –> Collections -> Click on "Create template"

Add template name and select sub collection template
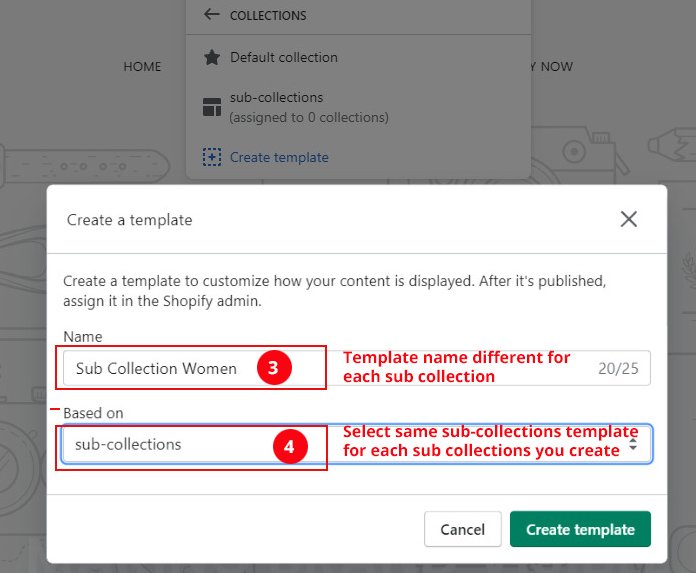
Now go to store admin create sub collection and select template you created in previous step.

To add collections on sub collection page and customize page looks,
Go : Online Store –> Click Customize –> Open the drop-down menu at the top of the page –> Collections -> Select sub collection template which you created in step 2

Click on Sub Collections from left sidebar to customize look
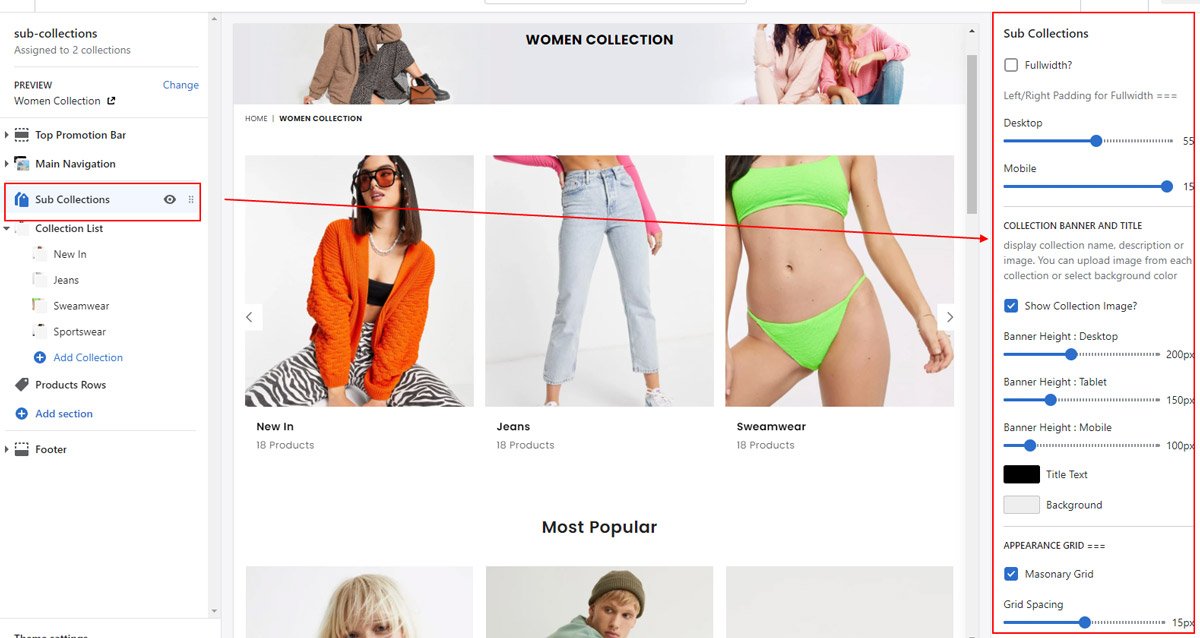
Click On "Add section" and add Carousel/ List banners section to add collections

Select collection block and on right side bar select collection, upload image and add title.
Click on "Add section" link to add more section on this page.
Click here to preview Brands List Page page
Online Store –> Pages –> Click Add page: Set page title, choose template brands and click save button
Customize brands list page from : Online Store –> Click Customize –> Open the drop-down menu at the top of the page –> Pages -> brands


Click on "Add section" link to add more section on this page.
Follow below url to create blog page
Shopify official article - How to create a blog and write an article
To customize look of blog pages, Go to : Online Store –> Click Customize –> Open the drop-down menu at the top of the page –> Blogs -> Default blog
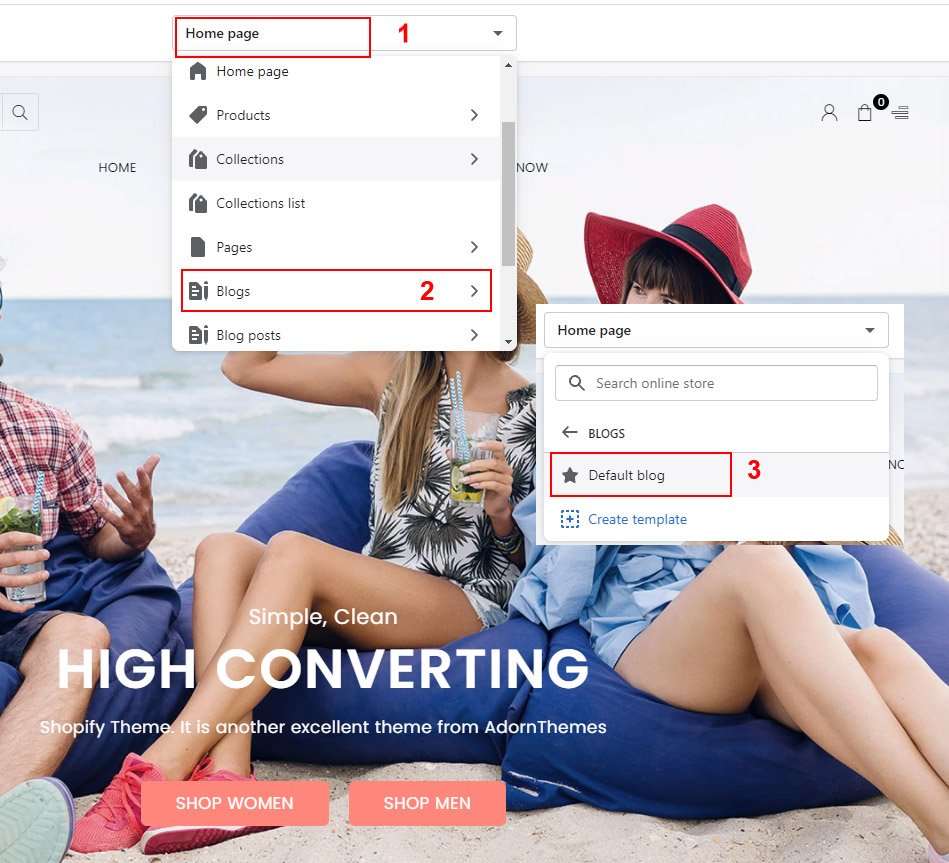
To customize look of article pages, Go to : Online Store –> Click Customize –> Open the drop-down menu at the top of the page –> Blog posts -> Default blog posts
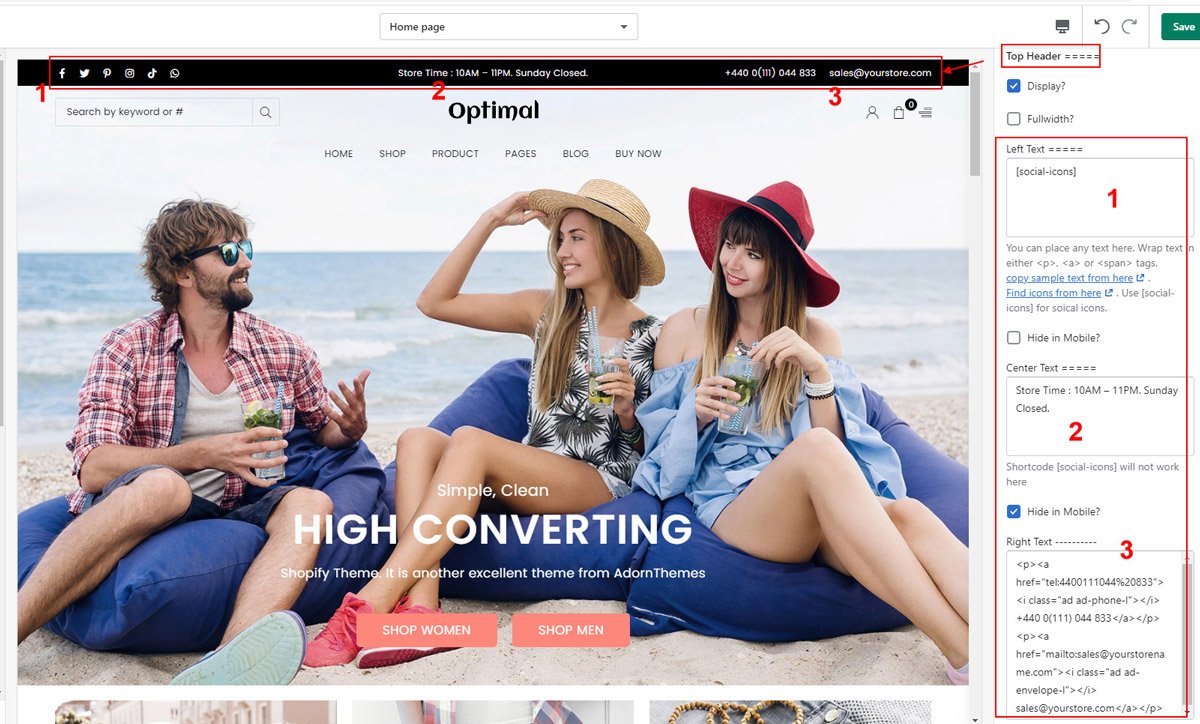
To customize look of the header
Go to : Online Store –> Select Theme –> Click Customize –> Click on Theme settings icon –> Click Header
Start customizing the header according to your requirements.
Please feel free to create support ticket if you find any difficulty to set header styles as available on demo stores
Settings and Options


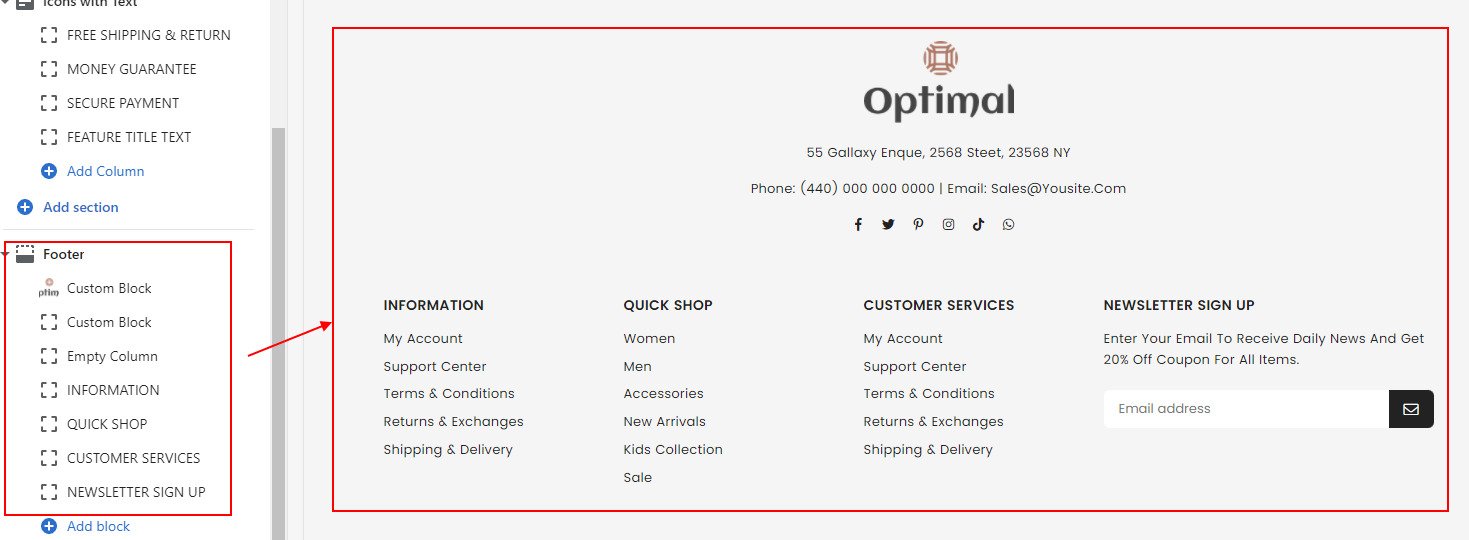
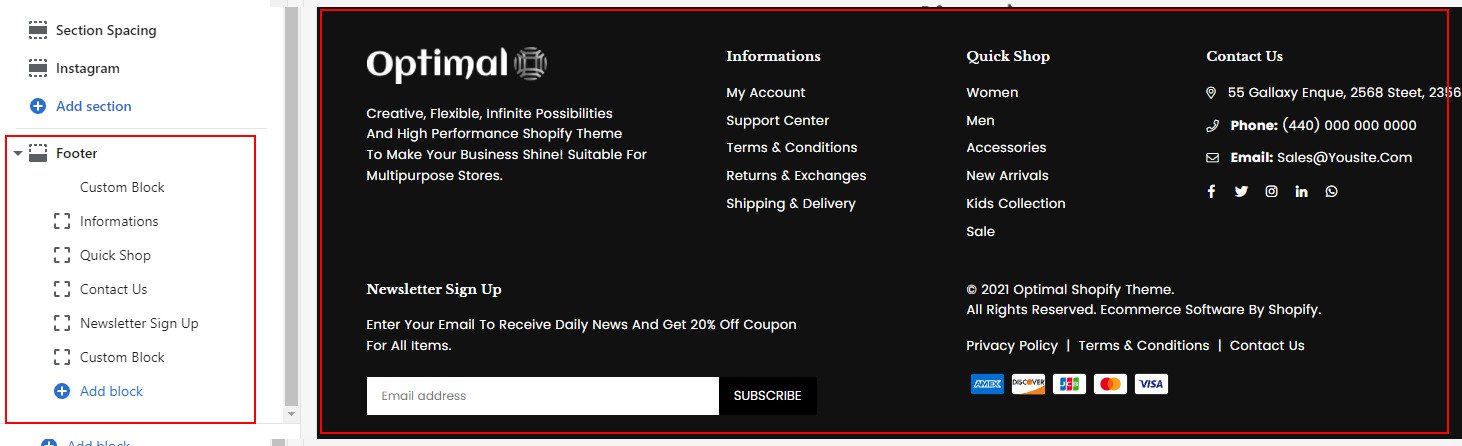
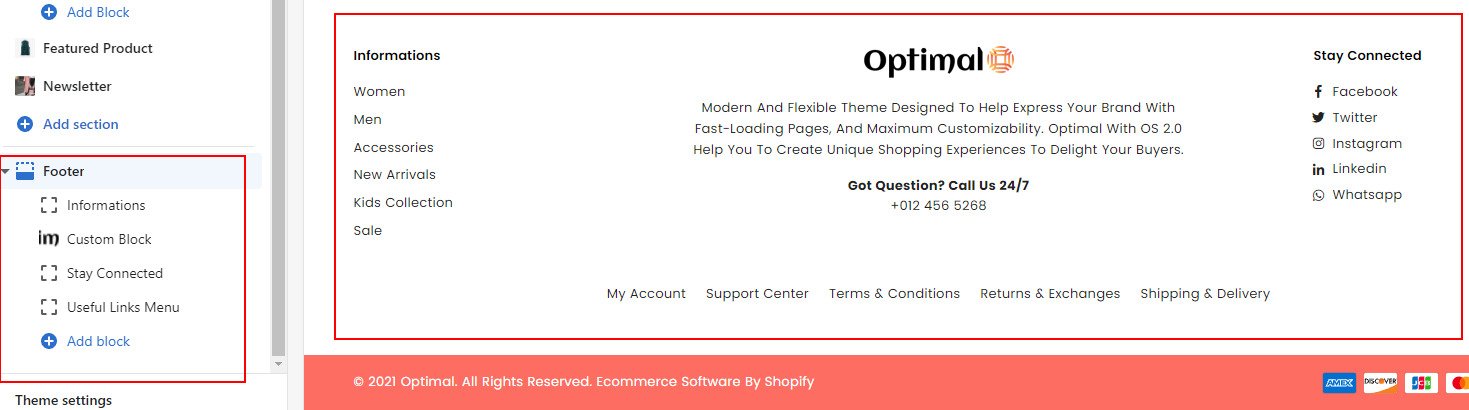
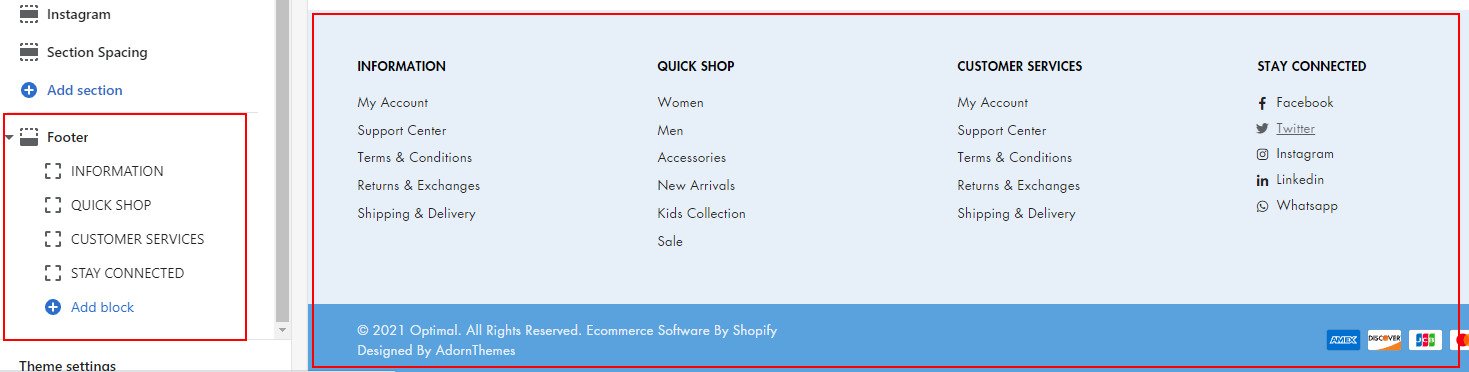
To customize look of footer
Go to: Online Store –> Select Theme –> Click Customize –> Footer ( Scroll down to bottom on left sidebar )
Start customizing the footer according to your requirements.
Please feel free to create support ticket if you find any difficulty to set footer styles as available on demo storesSettings and Options
Sections allows user to easily add or move content on their homepage with just a few clicks. You can preview your changes in real-time in either desktop or mobile view
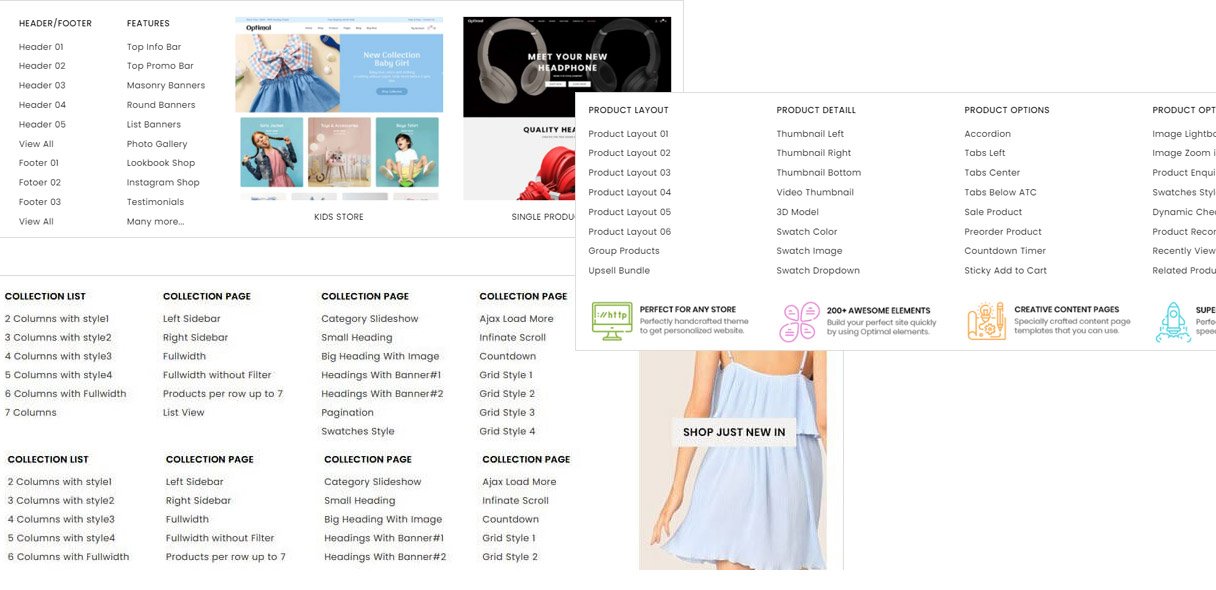
There are 30+ Sections and 99+ content block available to use. You can add,update,reorder and delete any sections any time as per your requirements.
Online store 2.0 make it very easy to add sections on every page without coding knowledge
Go to Online Store –> Customize –> Home page –> Top Promotion Bar

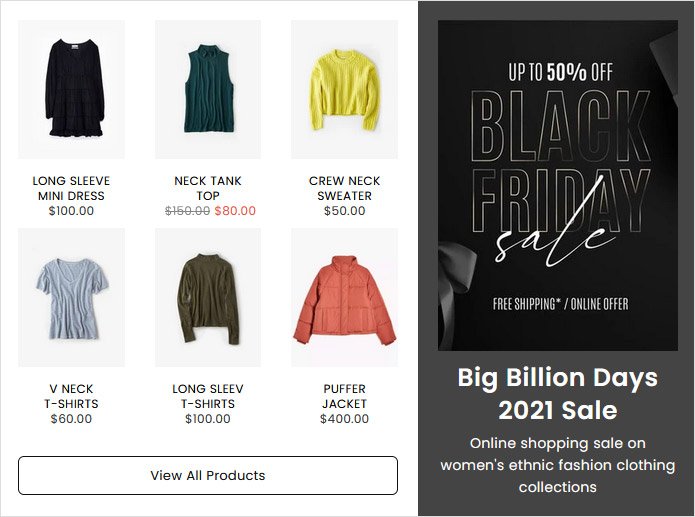
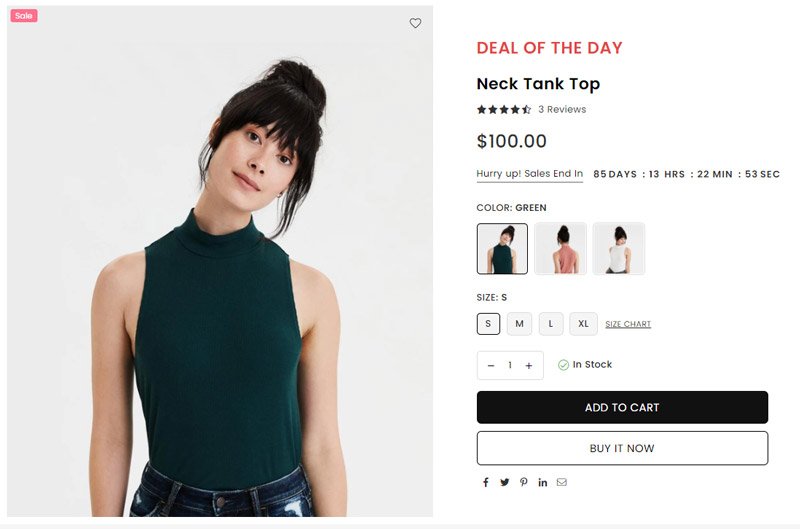
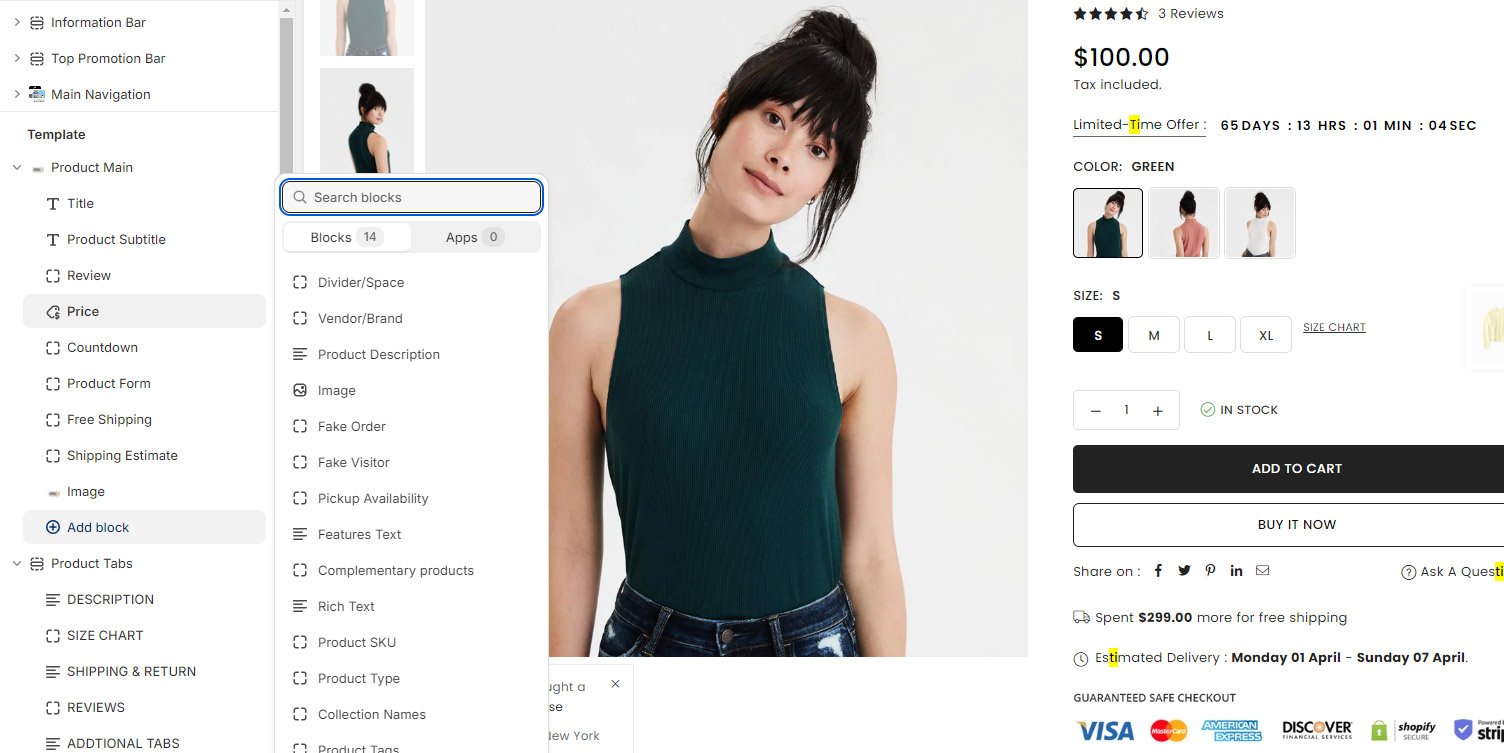
Go to Online Store –> Customize –> Home page –> click Add section –> click Featured Product
Section Preview
Go to Online Store –> Customize –> Home page –> click Add section –> click Products Columns

Go to Online Store –> Customize –> Home page –> click Add section –> click Products Rows
Section Preview

Settings and options

Go to Online Store –> Customize –> Home page –> Add Section –> click Products Slider
Section Preview

Settings and options
Go to Online Store –> Customize –> Home page –> click Add section –> click Tabs + Products
Section Preview. Preview Tab styles.
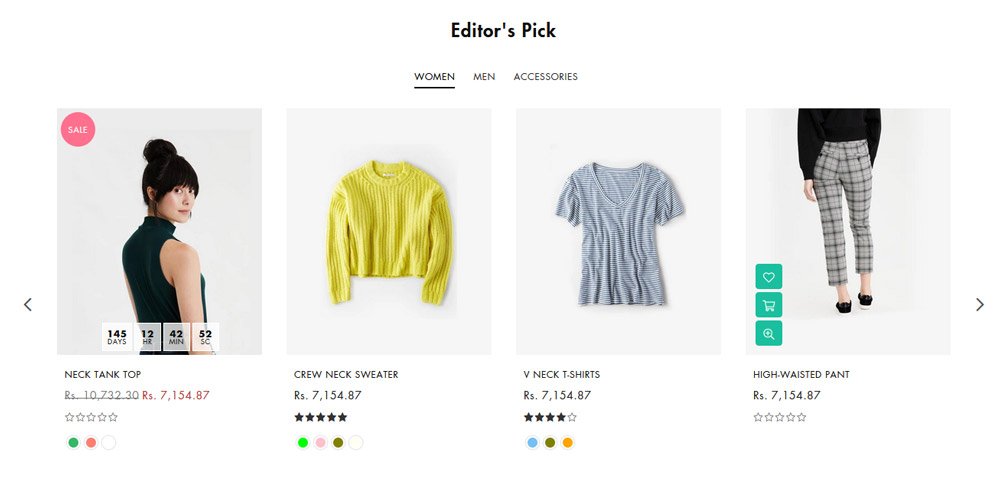
Settings and options

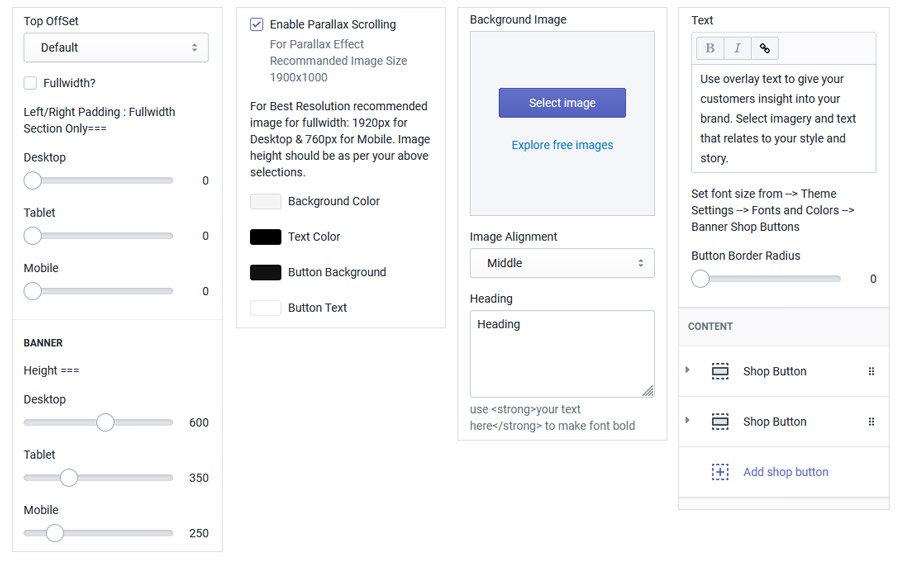
Go to Online Store –> Customize –> Home page –> click Add section –> click Hero Banner(CTA)
Section Preview. Preview Styles.

Settings and options
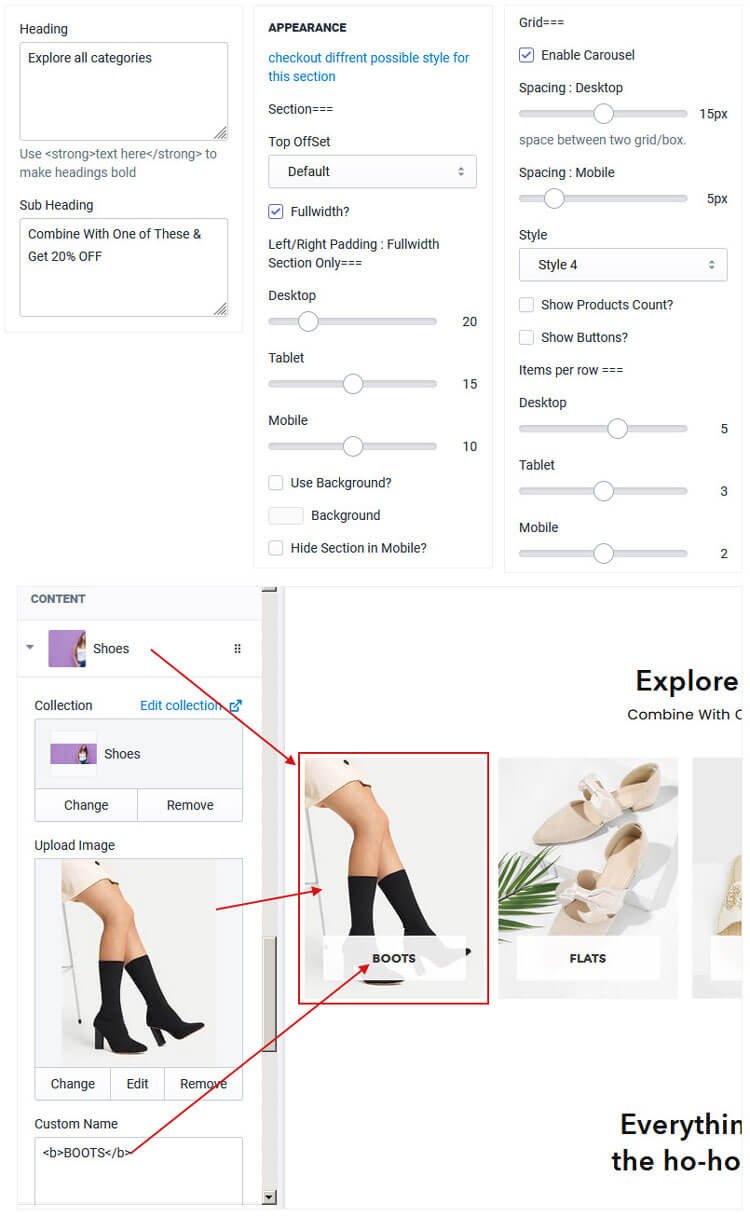
Go to Online Store –> Customize –> Home page –> click Add section –> click Collection List
Section Preview. Preview all styles
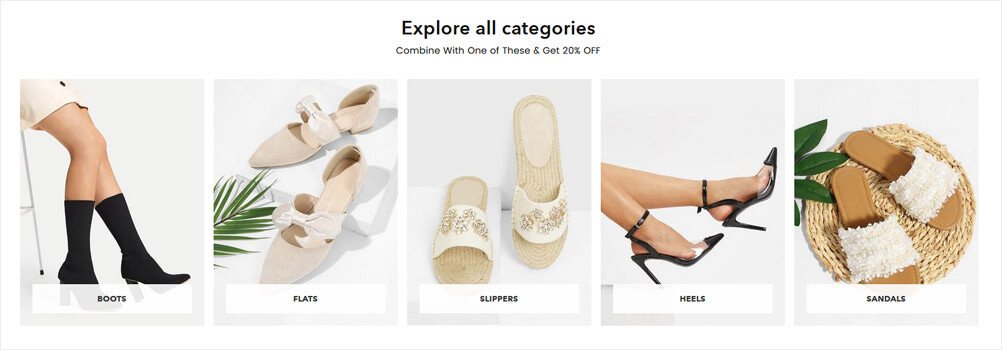
Settings and options
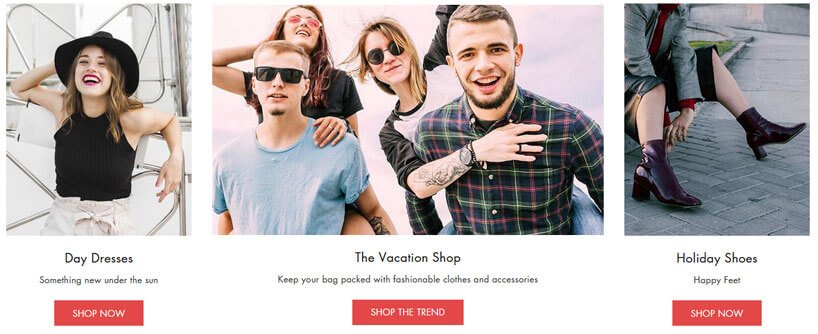
Go to Online Store –> Customize –> Home page –> Add Section –> Grid Banners
There are 7 different grid style in this section.
Section Preview. Preview few grid styles.

Settings and options
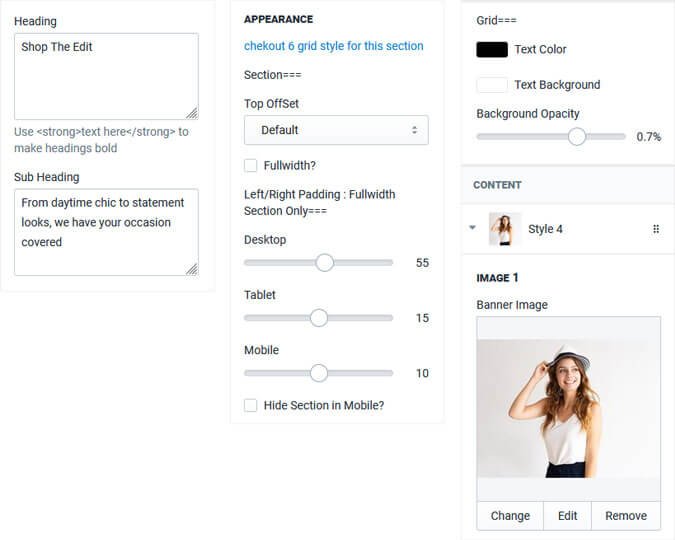
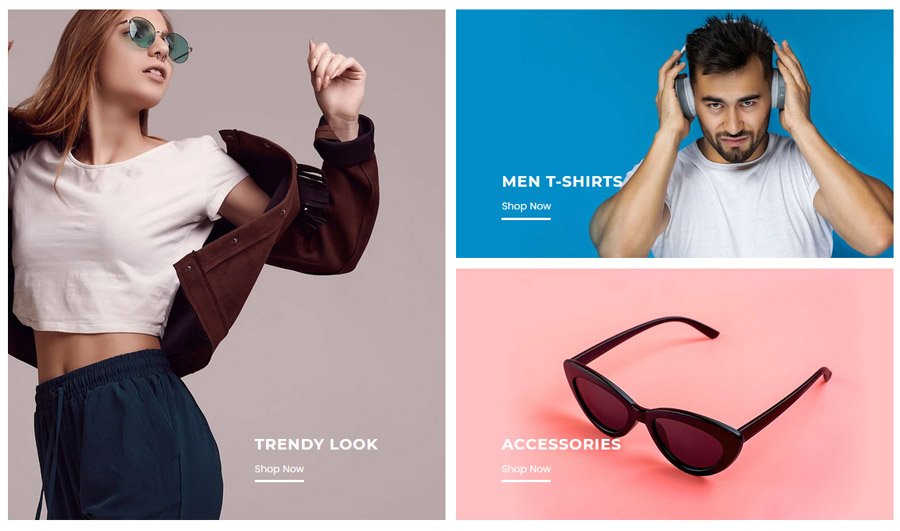
Go to Online Store –> Customize –> Home page –> Add Section –> Hero Banner
Section Preview. Preview style

Settings and options

Go to Online Store –> Customize –> Home page –> Add Section –> Masonry Banners
Masonry banners use flexible image sizes. Preview more styles. You would like it for sure :)
Go to Online Store –> Customize –> Home page –> Add Section –> Round Banners

Go to Online Store –> Customize –> Home page –> Add Section –> Slideshow
Go to Online Store –> Customize –> Home page –> Add Section –> Slideshow(Image Only)
You can display image slideshow without image crops anywhere on your pages. (Display image only not text)
Go to Online Store –> Customize –> Home page –> Add Section –> Image & Text(2 Columns)

Go to Online Store –> Customize –> Home page –> Add Section –> Image & Text(4 Columns)

Go to Online Store –> Customize –> Home page –> Add Section –> Image with Text & Features

Go to Online Store –> Customize –> Home page –> Add Section –> Text Columns & Top Images
Section Preview.

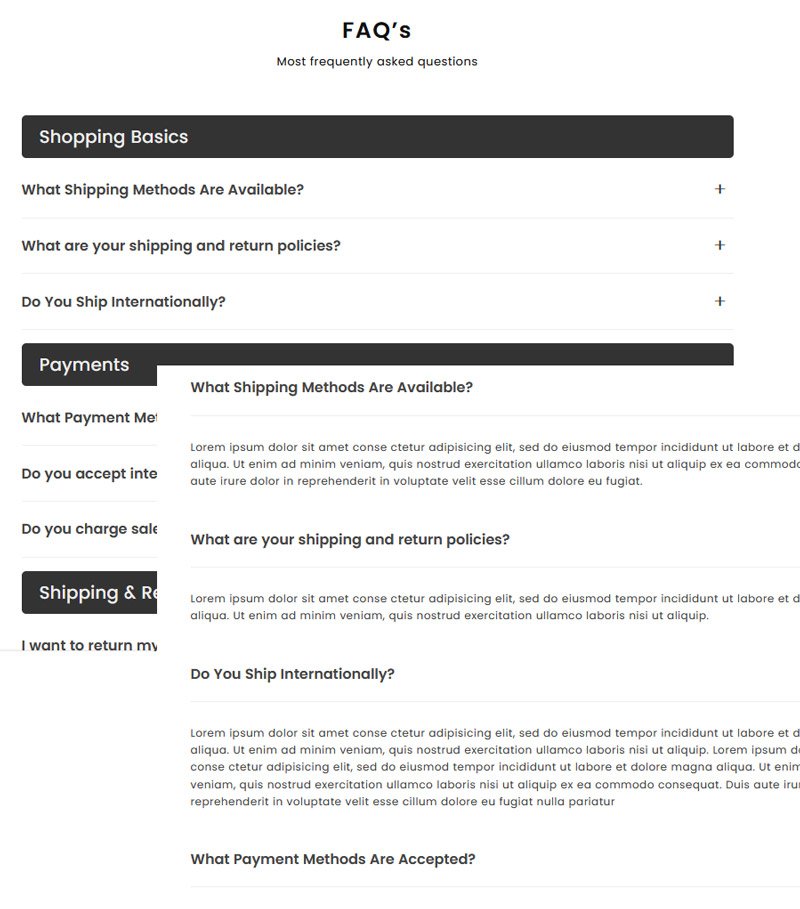
Go to Online Store –> Customize –> Home page –> Add Section –> FAQs
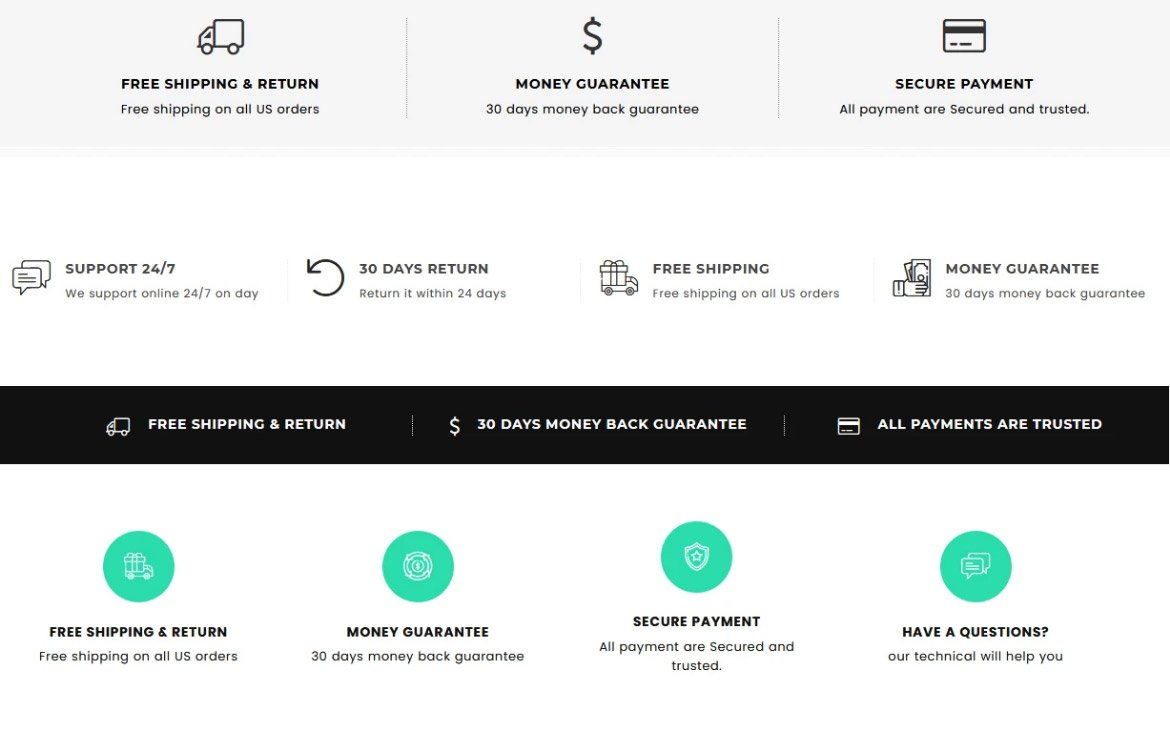
Go to Online Store –> Customize –> Home page –> Add Section –> Icons & Text
Section Preview.
Go to Online Store –> Customize –> Home page –> Add Section –> Promotion Bar
Section Preview.
Go to Online Store –> Customize –> Home page –> Add Section –> Rich Text Block
Section Preview.

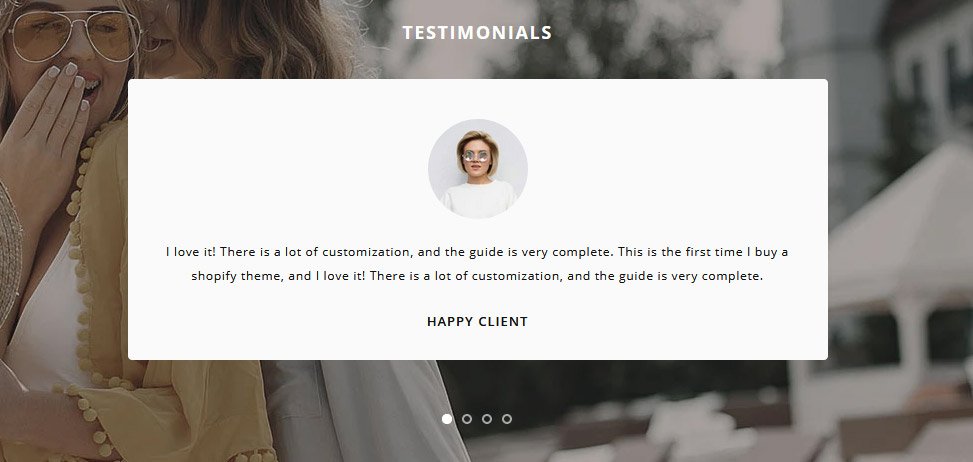
Go to Online Store –> Customize –> Home page –> Add Section –> Testimonials
Go to Online Store –> Customize –> Home page –> Add Section –> Instagram
Display instagram gallery as a List or Carousel

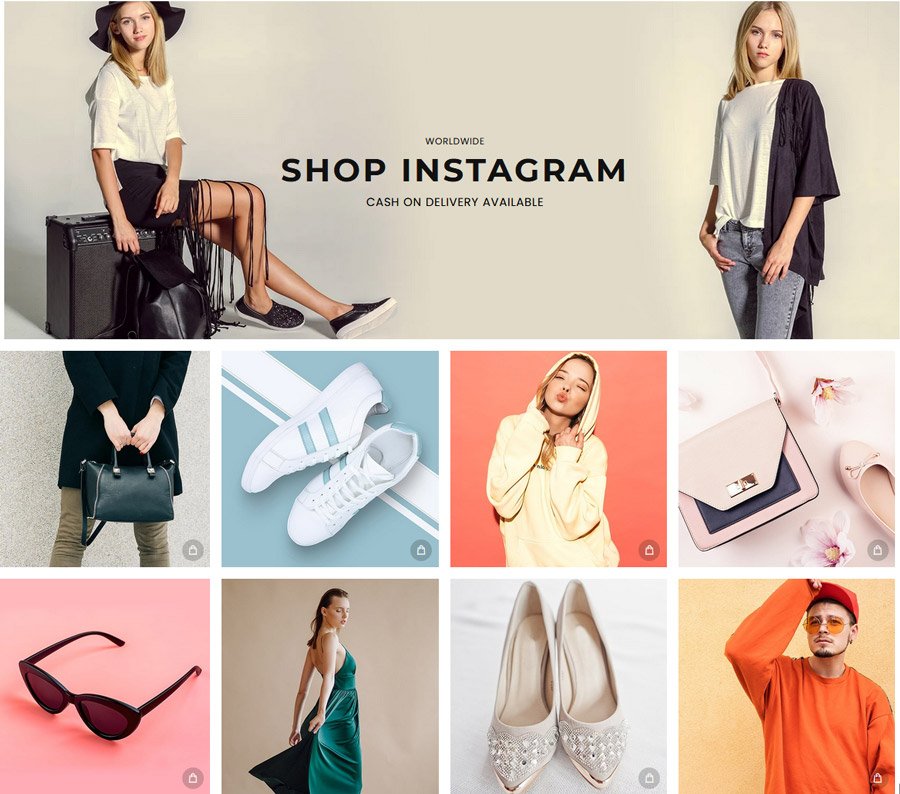
Go to Online Store –> Customize –> Home page –> Add Section –> Instagram Shop
Go to Online Store –> Customize –> Home page –> Add Section –> Logo List
![]()
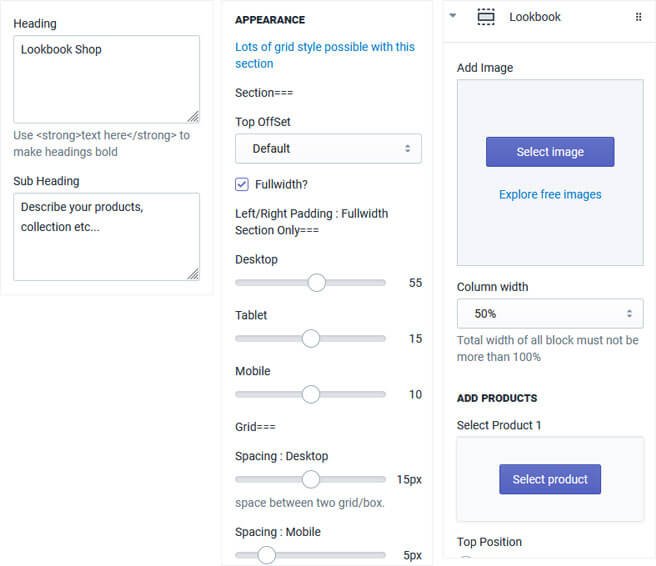
Go to Online Store –> Customize –> Home page –> Add Section –> Lookbook Shop
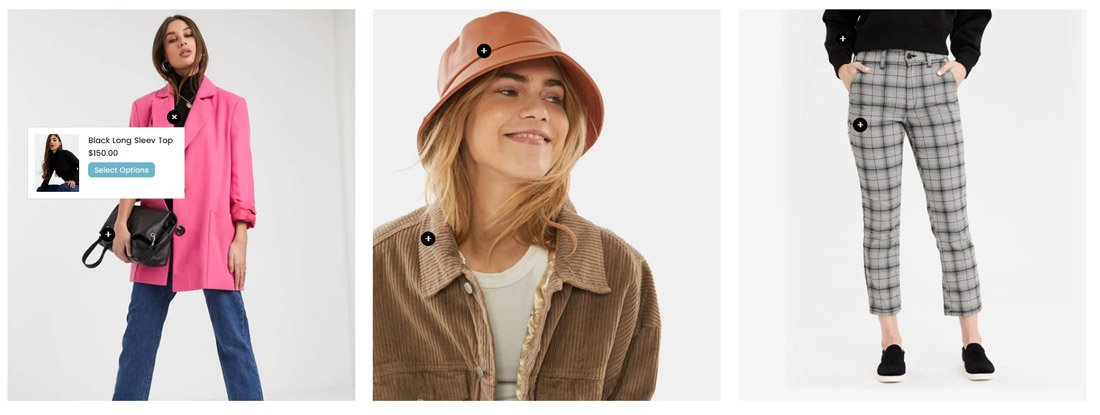
Settings and options
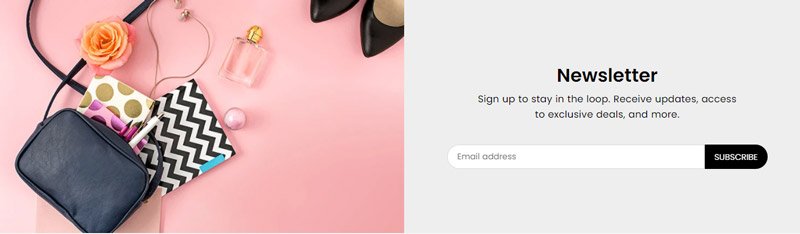
Go to Online Store –> Customize –> Home page –> Add Section –> Newsletter
Section Preview.


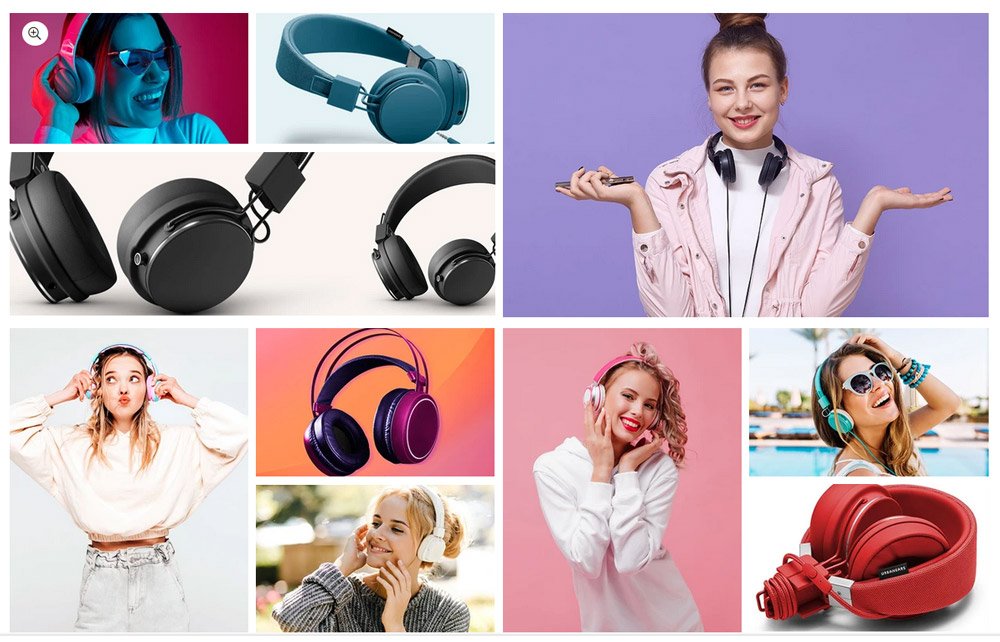
You can display images in grid and on click it will display image in lightbox popup.
Go to Online Store –> Customize –> Home page –> Add Section –> Image Gallery
You can display youtube video or MP4 video either in popup or background
Go to Online Store –> Customize –> Home page –> Add Section –> Video


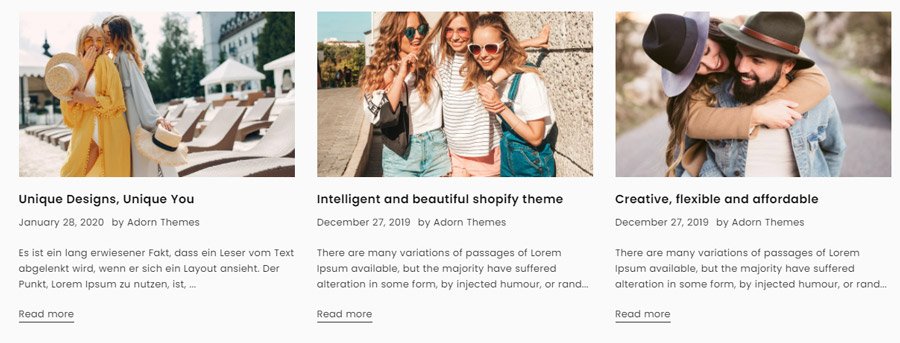
Go to Online Store –> Customize –> Home page –> Add Section –> Blog List

Collections and products display using custom block.
Go to Online Store –> Customize –> Home page –> Add Section –> Custom Block
Section Preview.

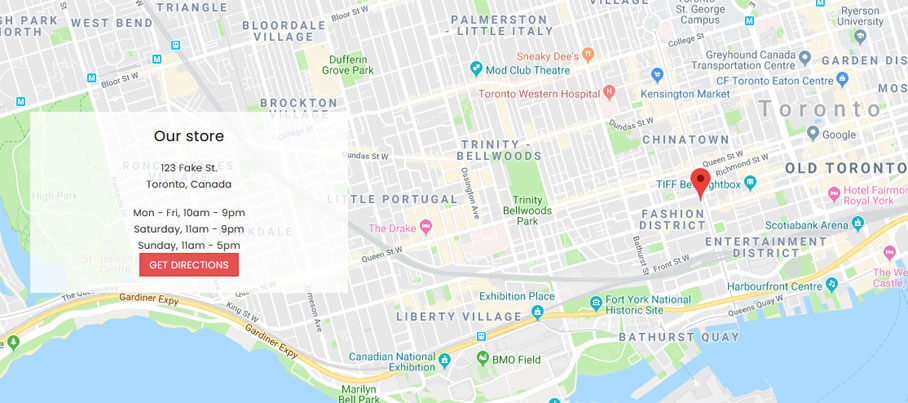
Go to Online Store –> Customize –> Home page –> Add Section –> Map
Section Preview.
Go to Online Store –> Customize –> Home page –> Add Section –> Masonry Block
Section Preview.

Go to : Online Store –> Click Customize –> Click Theme settings icon

In Theme Settings, Click Layout Style

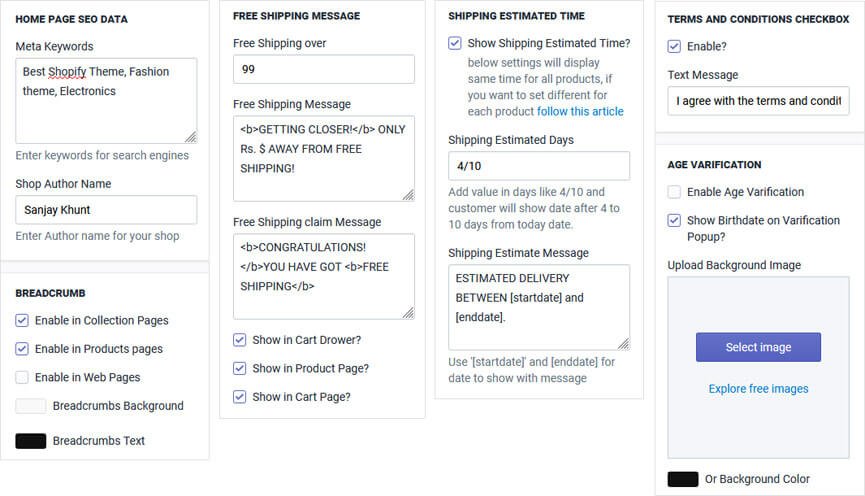
In Theme Settings, Click General Settings

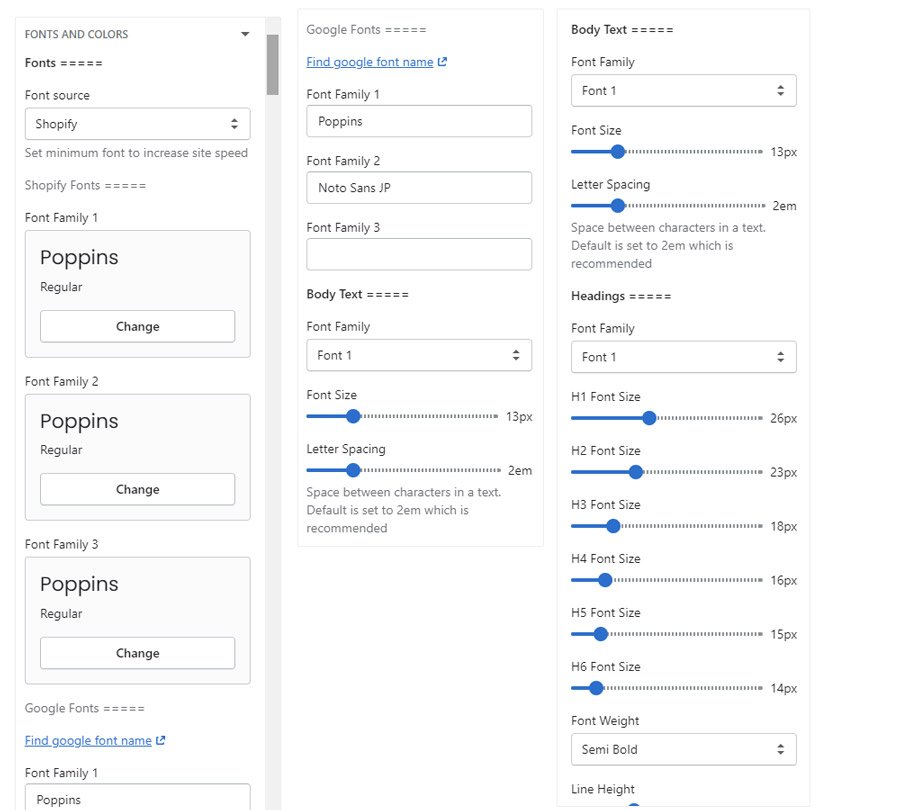
In Theme Settings, Click Fonts and Colors
In Theme Settings, Click Products Grid
Global product grids's settings. These settings will be overwrite by individual section's settings


In Theme Settings, Click Product Page


In Theme Settings, Click Currency & Language
To display currency & language on your store, you need to enable these option from Header section -> Store Currency & language

Enable currency conversion :
Select to show the currencies on store
Format :
There are 2 options: Without Currency, Ex: $10 and With Currency, $10 CAD
Supported currencies:
Add the currencies, separated by the space.
Default currency:
Enter the currency you want to set the default for your store
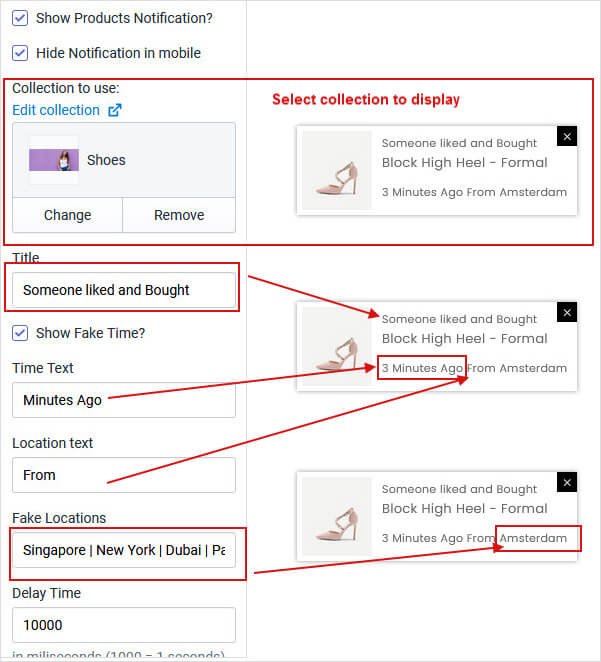
In Theme Settings, Click Product Notification Popup
Show live stream of products to your customers if anyone likes or bought product..
In Theme Settings, Click Quickview Popup

There are 4 different style for newsletter popup
In Theme Settings, Click Newsletter
Newsletter Popup Preview


In Theme Settings, Click Social Media

Social sharing options :
Select to show social sharing on store
Social accounts :
Enter url social accounts which you want to show on store else leave blank
In Theme Settings, Click Custom Css
You can do settings for Banner , Logo , Main Content Area , Order Summary , Typography and Colors of Checkout Page

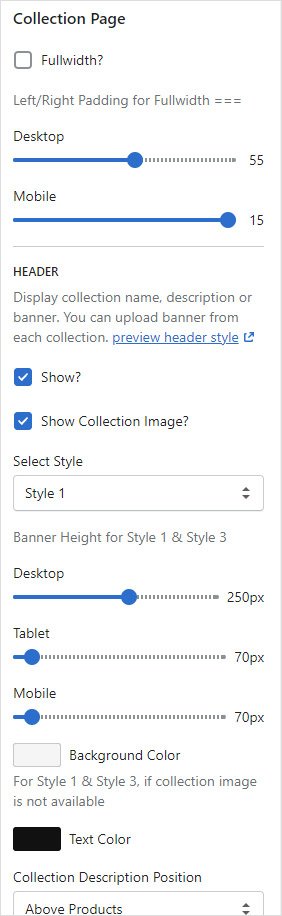
We have included many options to display Collection Page. So you can choose your own style for Collection Page.
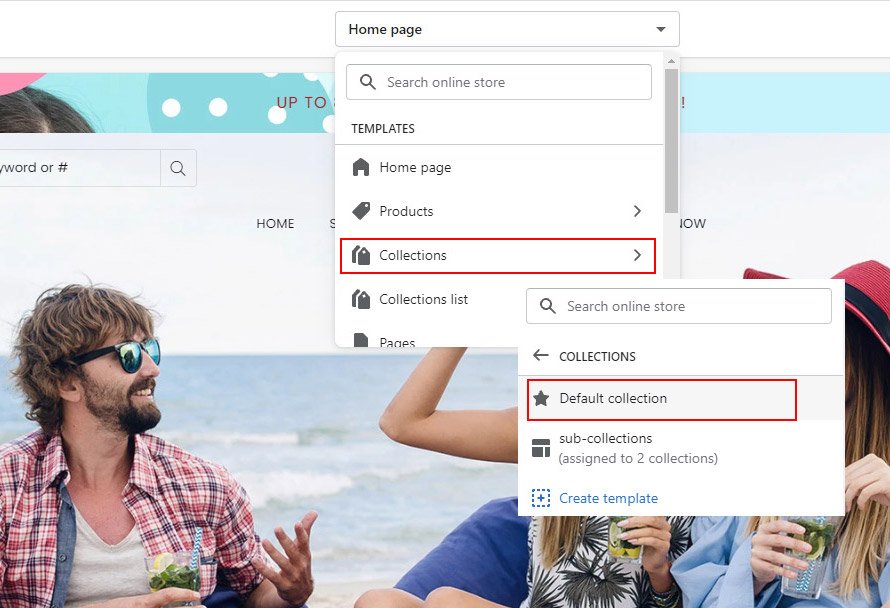
Go to Online Store –> Click Customize –> Open the drop-down menu at the top of the page –> Collections –> Default collection
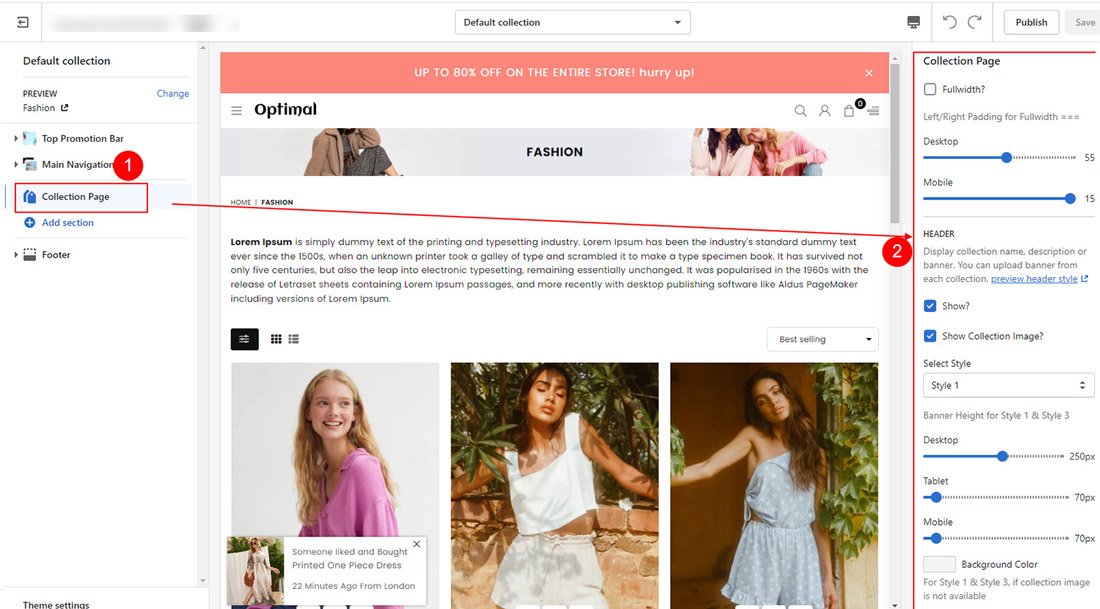
Click on Collection Page from left sidebar to customize page look and you will see all page options on right sidebar.
There are different options to display collection page are as below
Click on Collection Page from left sidebar and you will see page header options on right sidebar.
|
|
Product Filtering is built using products tags of shopify. TAGS ARE CASE SENSITIVE. So if you have enter tags in small letter in sidebar assign same tags in small to product also.
In your store you can see Product filtering on top of left sidebar of collection page (As Product Filters)
There are unlimited filters available for your products using product tags.
All custom colors like Sage, Olive Green, Camel, Cream, Caramel, Teal..etc should be predefine in Custom Color Secton. Add all these colors from below path
Online Store –> Customize –> Click "Sectons icon" from left bar –> Scroll down to bottom to the Custom colors section Now follow below steps to add Color filters
Online Store –> Click Customize –> Open the drop-down menu at the top of the page –> Collections –> Default collection
Click "Add block" from left sidebar and add Filter By Color Tags"

Add Filter by section title and Filter tags. Select Swatch Size and Swatch Style from dropdown.

Go to Products -> Select Product -> Scroll down to "Tags" block.
In Tags sections, Start adding same tags that you enter in sidebar color block. (You need to assing Only product relavant tags. Tags are different for each products.)


Add Filter By Title and Filter tags

Now Go to Products -> Select Product -> Scroll down to "Tags" block.
In Tags sections, Start adding same tag that you enter in sidebar text block. (You need to assing Only product relavant tags. Tags are different for each products.)


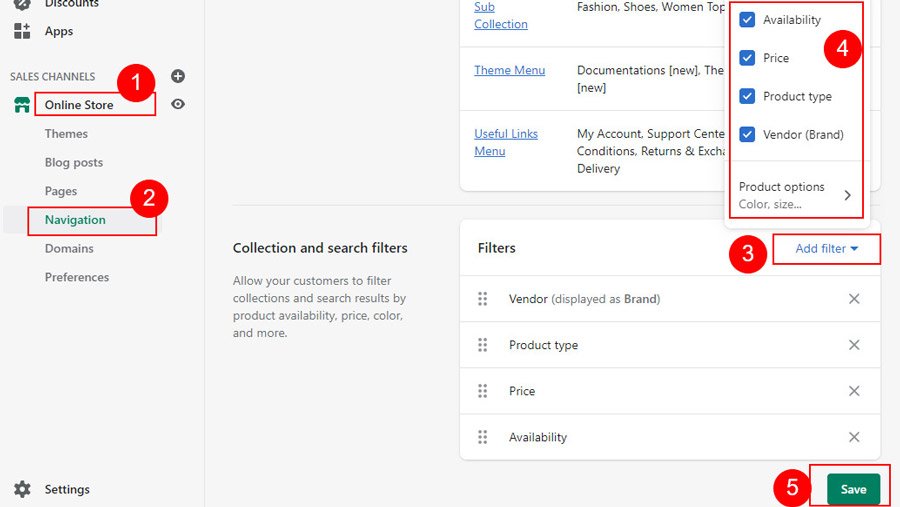
With OS 2.0 product filtering are dynamic. When Collection filtering is enabled, the filter options appear on collection page and search result page.
Customers can filter their products by availability, product types, product vendors and Variant options(colors,size,height..)to find the products that interest them the most.
With Dynamic product filters, you do not need to go with that lengthy time consuming process of filter setup.
To Enable products filter on your store, follow below steps
|
|
All custom colors like Sage, Olive Green, Camel, Cream, Caramel, Teal..etc should be predefine in Custom Color Secton. Add all these colors from below path
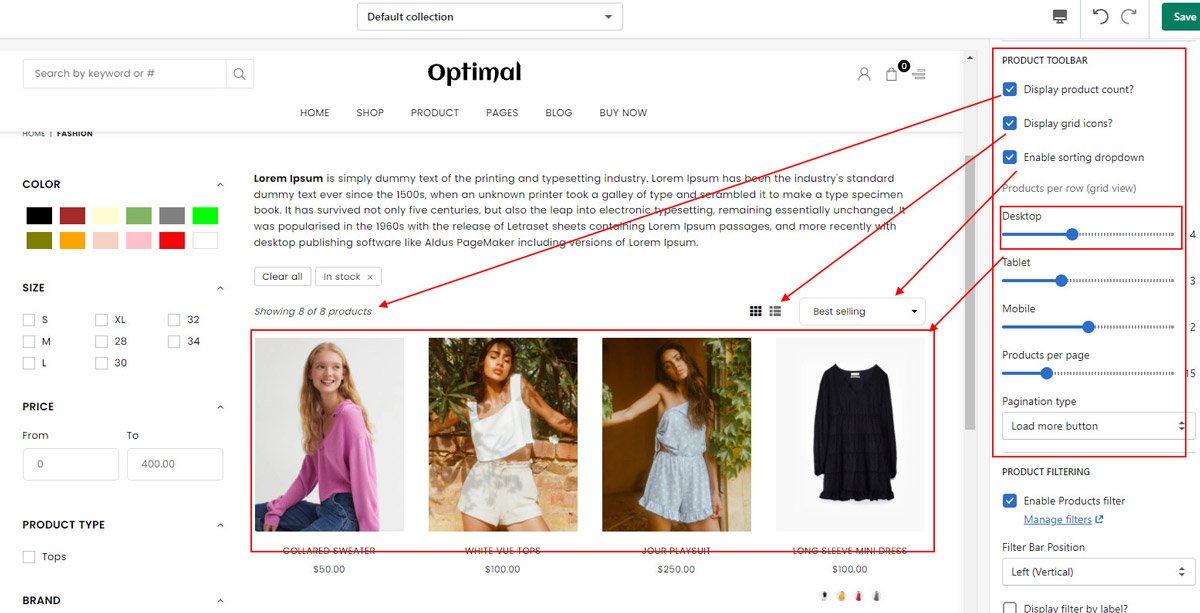
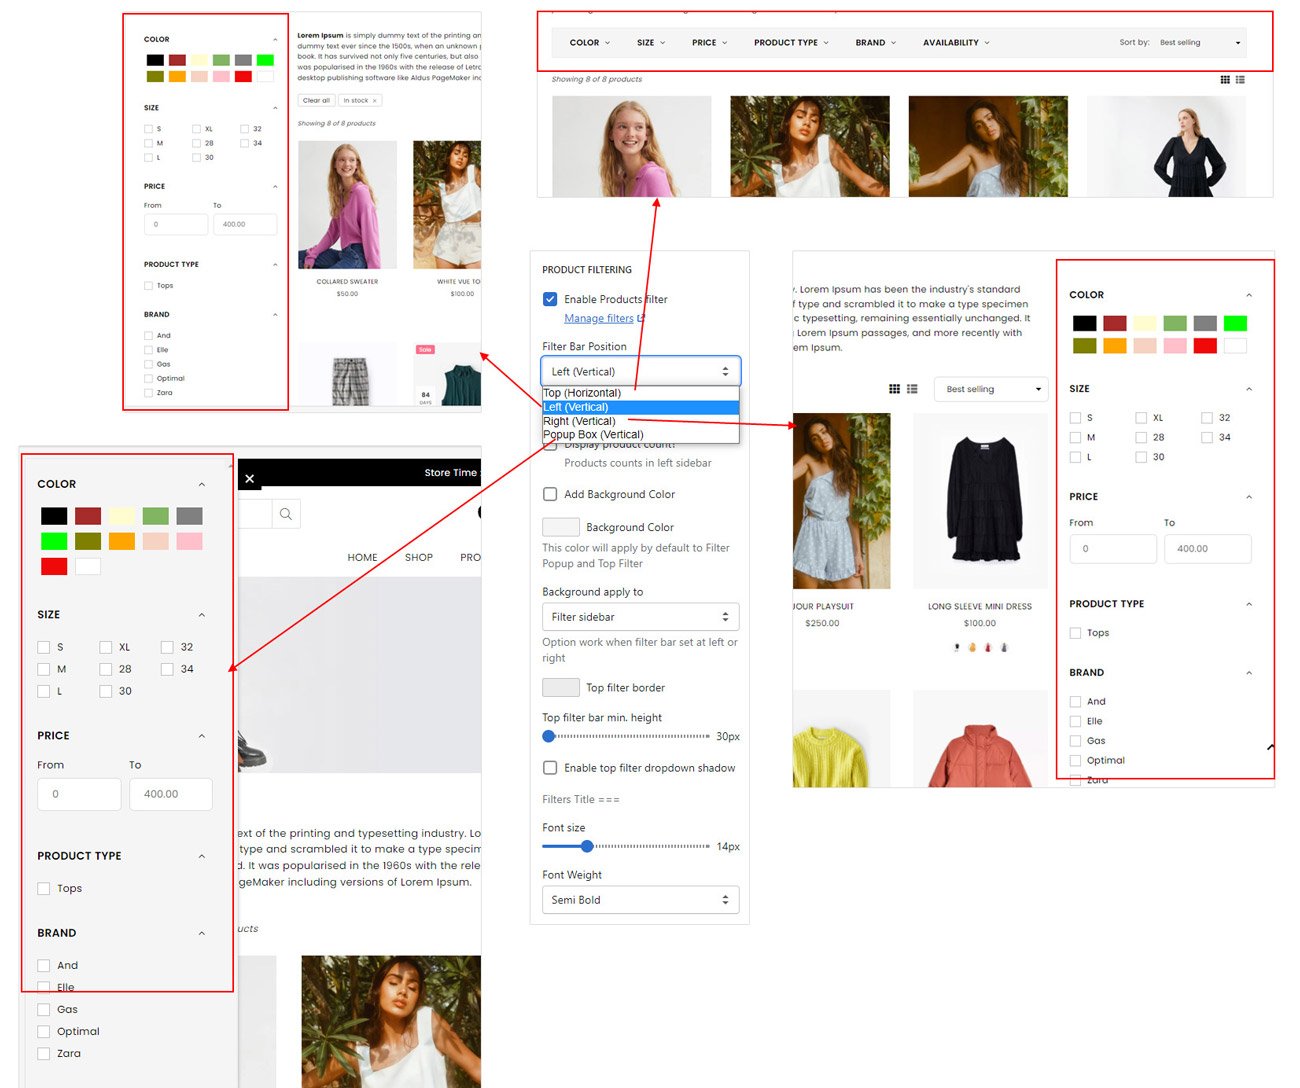
Online Store –> Customize –> Click "Sectons icon" from left bar –> Scroll down to bottom to the Custom colors section There are 4 style you can display products filter. Display in Left Sidebar, Right Sidebar, Top Bar, Popup Box
Go to Online Store –> Click Customize –> Open the drop-down menu at the top of the page –> Collections –> Default collection
Click on Collection Page from left sidebar and you will see products filter options options on right sidebar.
Go to Online Store –> Click Customize –> Open the drop-down menu at the top of the page –> Products –> Default product
Click on Product Description Tab from left sidebar

Go to Online Store –> Click Customize –> Open the drop-down menu at the top of the page –> Products –> Default product
Click on Related product section from left sidebar
Go to Online Store –> Click Customize –> Open the drop-down menu at the top of the page –> Products –> Default product
Click on Recommended Products section from left sidebar
Go to Online Store –> Click Customize –> Open the drop-down menu at the top of the page –> Products –> Default product
Click on Recently Viewed Products section from left sidebar
We advise reading and familiarizing yourself with the Shopify Variants. It is an extremely well written and easy to understand.
There are many styles to display product swatches


Store Admin –> Products –> Add Product –> 
When you select Color Swatch style to display product swatches, You need to add custom colors(like Burgundy, Cream, Sage, Ivory) for your products.
Go to Store Admin –> Customize –> Sections –> Custom Colors ( Find this section right after footer section)
Product Pre-Order allows you to sale your items even if products are out of stock on your store.
Step 1 : From your Shopify admin, click Products and select product you want to manage for pre order
Select "Continue selling when out of stock" and click save
Step 2 :From your Shopify admin, go to Settings –> Payments.
Find Payment capture Click on Manage button -> Select "Manually capture payment for orders." and click save.

Go to: Online Store –> Themes ->
From the list of themes, click on the button with three dots for the theme you are working on. Click on Edit theme default content.
Here's a quick way to change some of the more commonly text or you can use other language
Note: All images are just used for Demo Purpose Only. They are not part of the theme and NOT included in the final purchase files.