Displaying a menu at the top of your store helps your customers browse your store and find important pages. With only some simple steps, you can add menu items that link to your webpages, collections, products, store policies, blogs, email links, external websites, etc.
Before you start setting up menus in Revone shopify theme, please have a look at the links below that explain in detail how to create or edit menus and collections.
- How to create a new menu ?
- How to create a dropdown menu?
- How to create a collection?
- How to create a smart collection?
Create new menu #
You can create a link list of collections, products, pages or blogs in menu. Kindly refer to the well-written article from Shopify for guidance on creating a new menu, as well as editing or removing items.
You can select this menu from theme editor to be displayed on top navigation or select from footer section to add menu links in the footer.
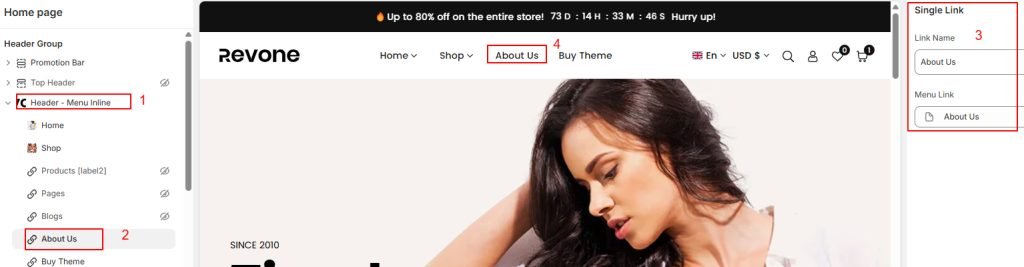
Single Link #
Add this menu block to display only links (without dropdowns or megamenus) in the store header menu.
- In the theme editor -> Click Header -> Add block -> Click Single Link
- Set Link Name, Select Menu Link and click Save.
- Repeat above steps for all menu items you wish to add in header menu.
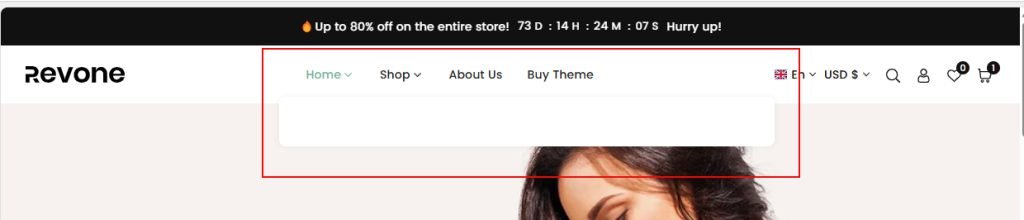
Display white popup or white space while you hover on menu item on your store like in the example below? This is megamenu or dropdown block item that is imported by default on your store while you install theme. Please remove that current menu block and add Single link block instead. Please follow above given steps to add single link block.
Dropdown Menu #

To display dropdown menu on your store, first you need to create menu with nested menu items. Click to know more in detail.
Build drop-down menus #
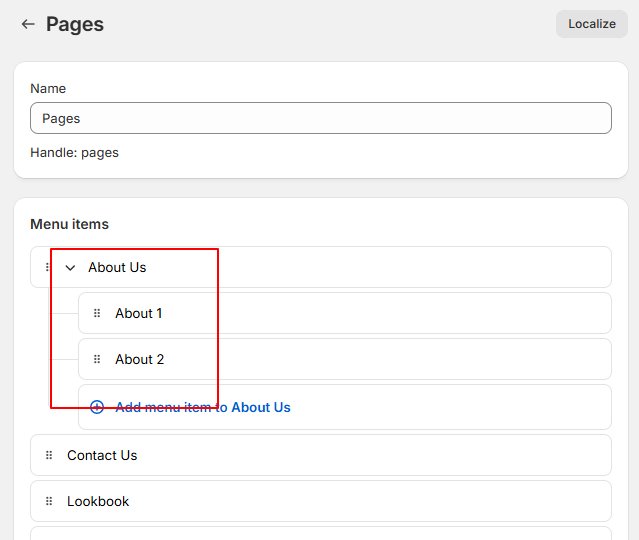
- From your Shopify admin, go to Content > Menus->.
- Click Create menu -> Add “Name”, then click “add menu item”
- Enter Label, Link and click Add icon
- Likewise, add all menu items and click save
- To display nested menu item(child menu item), Drag & Drop menu item to top level item and click save
Add drop-down menu from theme #
- In the theme editor -> Click Header -> Add block -> Click Dropdown Menu
- Set Link Name, Menu Link and Select Dropdown Menu
- Click save

Megamenu Modern #
- Show menu items up to 6 columns in one row Or show menu item in multiple row
- Show up to four image banners in vertical or horizontal view
Reference image

Steps 1:
- To show megamenu modern on your store, first you need to create a menu with sub menu items through your store’s admin panel
- Add Menu items with Sub Menu Items As shown below ( screenshot is only for reference )

Step 2:
- In the theme editor -> click Header section -> Add block ->
Click MM Modern - Add Link Name, Menu Link, Select Menu, Select Columns, Set Banner Images(Optional).

Megamenu Links & Products #
- Show menu links in up to 5 column
- Show products slider
- Show Image banner
- In the theme editor –> Click Header section -> Add block -> Click MM Links & Products
- Set Links Name, Menu Link and Select menu to display menu items
- To display product, set column title, select products and products per row
- To display image banner, enable option from featured column, set title, sub title, button text and links

Top Image Columns #
Show up to 5 columns with a distinct menu and option to display image at the top for every column

Step 1:
- From your Shopify admin, go to Content > Menus->.
- Click Create menu -> Add “Name”, then click “add menu item”
- Enter Label, Link and click Add icon
Add Menu with Sub Menu Items. To use this Megamenu, Please create different menus for each column.
I.e. If you want to display 4 columns to Display Women, Men, Kids, and Accessories collection then create 4 different menus. How to create Menu?
- In the theme editor –> Click Header section -> Add block -> Click MM Top Image Columns
- Set Link Name, Menu Link
- Set title, image, image link and select menu for each column you want to display

Megamenu Categories #
- Display main menu items(Collection) in vertical view
- Auto retrieve products from main menu item(collection) and display on right side ( Hide products if you do not want to highlight products in menu)
Reference image

Steps 1:
To display megamenu categories on your store, first you need to create a menu with sub menu items from your shopify store admin
Add Menu items with Sub Menu Items As display below ( screenshot is only for reference ).
Select collection(category) for each main menu item you create.

Step 2:
- In the theme editor -> Select Header -> Add block ->
Click MM Categories - Add Link Name, Menu Link, Select Menu.
- You can show icons for each menu items.
- Set main links and sub links look and set columns for sub links
- Enable options to show products from main link item. Set option to show products in popup
- click save

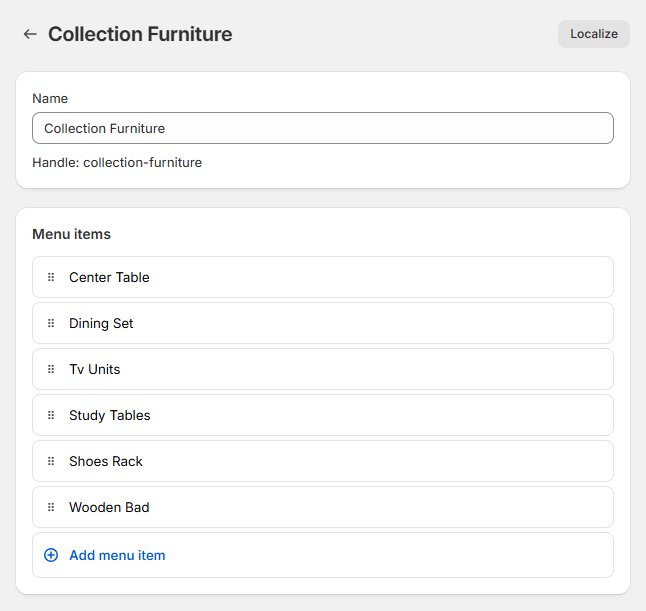
Megamenu Collections #
- Display collections with image and title
- Display collections up to 10 columns Or with multiple row

Steps 1:
To display megamenu collections on your store, first create a menu from your shopify store admin
Add Menu items. Select collection link for each menu item you create. ( screenshot is only for reference ).
Step 2:
- In the theme editor -> Click Header section -> Add block ->
Click MM collections - Add Link Name, Menu Link, Select Menu.
- Show collection image and manage look.
- Set font size for collection title and select columns for collections
- click save